жҲ‘们зҺ°еңЁе·Із»ҸдҪҝз”ЁWiXдёҖж®өж—¶й—ҙдәҶпјҢе°Ҫз®Ўдәә们жҷ®йҒҚжҠұжҖЁжҳ“з”ЁжҖ§пјҢдҪҶе®ғиҝҳжҳҜзӣёеҪ“дёҚй”ҷгҖӮжҲ‘жӯЈеңЁеҜ»жүҫзҡ„жҳҜжңүз”Ёзҡ„е»әи®®пјҡ
зӯ”жЎҲ 0 :(еҫ—еҲҶпјҡ157)
е°ҶеҸҳйҮҸдҝқеӯҳеңЁеҚ•зӢ¬зҡ„wxiеҢ…еҗ«ж–Ү件дёӯгҖӮе…Ғи®ёйҮҚеӨҚдҪҝз”ЁпјҢеҸҳйҮҸжӣҙеҝ«жүҫеҲ°пјҢ并且пјҲеҰӮжһңйңҖиҰҒпјүе…Ғи®ёеӨ–йғЁе·Ҙе…·жӣҙе®№жҳ“ж“ҚдҪңгҖӮ
дёәx86е’Ңx64зүҲжң¬е®ҡд№үе№іеҸ°еҸҳйҮҸ
<!-- Product name as you want it to appear in Add/Remove Programs-->
<?if $(var.Platform) = x64 ?>
  <?define ProductName = "Product Name (64 bit)" ?>
  <?define Win64 = "yes" ?>
  <?define PlatformProgramFilesFolder = "ProgramFiles64Folder" ?>
<?else ?>
  <?define ProductName = "Product Name" ?>
  <?define Win64 = "no" ?>
  <?define PlatformProgramFilesFolder = "ProgramFilesFolder" ?>
<?endif ?>
е°Ҷе®үиЈ…дҪҚзҪ®еӯҳеӮЁеңЁжіЁеҶҢиЎЁдёӯпјҢеҗҜз”ЁеҚҮзә§д»ҘжҹҘжүҫжӯЈзЎ®зҡ„дҪҚзҪ®гҖӮдҫӢеҰӮпјҢеҰӮжһңз”ЁжҲ·и®ҫзҪ®иҮӘе®ҡд№үе®үиЈ…зӣ®еҪ•гҖӮ
 <Property Id="INSTALLLOCATION">
    <RegistrySearch Id="RegistrySearch" Type="raw" Root="HKLM" Win64="$(var.Win64)"
              Key="Software\Company\Product" Name="InstallLocation" />
 </Property>
жіЁж„ҸпјҡWiX guru Rob MenschingеҸ‘еёғдәҶдёҖдёӘexcellent blog entryпјҢе…¶дёӯиҜҰз»Ҷд»Ӣз»ҚдәҶд»Һе‘Ҫд»ӨиЎҢи®ҫзҪ®еұһжҖ§ж—¶зҡ„иҫ№зјҳжғ…еҶөгҖӮ
дҪҝз”Ё1. 2.е’Ң3зҡ„дҫӢеӯҗгҖӮ
<?include $(sys.CURRENTDIR)\Config.wxi?>
<Product ... >
  <Package InstallerVersion="200" InstallPrivileges="elevated"
           InstallScope="perMachine" Platform="$(var.Platform)"
           Compressed="yes" Description="$(var.ProductName)" />
е’Ң
<Directory Id="TARGETDIR" Name="SourceDir">
  <Directory Id="$(var.PlatformProgramFilesFolder)">
    <Directory Id="INSTALLLOCATION" Name="$(var.InstallName)">
жңҖз®ҖеҚ•зҡ„ж–№жі•е§Ӣз»ҲжҳҜmajor upgradesпјҢеӣ дёәе®ғе…Ғи®ёеҚ•дёӘMSIдёӯзҡ„ж–°е®үиЈ…е’ҢеҚҮзә§гҖӮ UpgradeCodeе·Ідҝ®еӨҚдёәе”ҜдёҖзҡ„GuidпјҢйҷӨйқһжҲ‘们дёҚжғіеҚҮзә§зҺ°жңүдә§е“ҒпјҢеҗҰеҲҷж°ёиҝңдёҚдјҡжӣҙж”№гҖӮ
жіЁж„ҸпјҡеңЁWiX 3.5дёӯпјҢжңүдёҖдёӘж–°зҡ„MajorUpgradeе…ғзҙ еҸҜд»Ҙз”ҹе‘Ҫeven easierпјҒ
еңЁвҖңж·»еҠ /еҲ йҷӨзЁӢеәҸвҖқдёӯеҲӣе»әеӣҫж Ү
<Icon Id="Company.ico" SourceFile="..\Tools\Company\Images\Company.ico" />
<Property Id="ARPPRODUCTICON" Value="Company.ico" />
<Property Id="ARPHELPLINK" Value="http://www.example.com/" />
еңЁеҸ‘еёғзүҲжң¬дёӯпјҢжҲ‘们еҜ№е®үиЈ…зЁӢеәҸиҝӣиЎҢдәҶзүҲжң¬жҺ§еҲ¶пјҢе°Ҷmsiж–Ү件еӨҚеҲ¶еҲ°йғЁзҪІзӣ®еҪ•гҖӮдҪҝз”Ёд»ҺAfterBuildзӣ®ж Үи°ғз”Ёзҡ„wixprojзӣ®ж Үзҡ„зӨәдҫӢпјҡ
<Target Name="CopyToDeploy" Condition="'$(Configuration)' == 'Release'">
  <!-- Note we append AssemblyFileVersion, changing MSI file name only works with Major Upgrades -->
  <Copy SourceFiles="$(OutputPath)$(OutputName).msi"
        DestinationFiles="..\Deploy\Setup\$(OutputName) $(AssemblyFileVersion)_$(Platform).msi" />
</Target>
дҪҝз”ЁheatжқҘ收йӣҶеёҰжңүйҖҡй…Қз¬ҰпјҲ*пјүGuidзҡ„ж–Ү件гҖӮеҰӮжһңжӮЁжғіеңЁеӨҡдёӘйЎ№зӣ®дёӯйҮҚз”ЁWXSж–Ү件пјҢеҲҷйқһеёёжңүз”ЁпјҲиҜ·еҸӮйҳ…жҲ‘еҜ№еҗҢдёҖдә§е“Ғзҡ„еӨҡдёӘзүҲжң¬зҡ„еӣһзӯ”пјүгҖӮдҫӢеҰӮпјҢжӯӨжү№еӨ„зҗҶж–Ү件дјҡиҮӘеҠЁж”¶йӣҶRoboHelpиҫ“еҮәгҖӮ
@echo off
robocopy ..\WebHelp "%TEMP%\WebHelpTemp\WebHelp" /E /NP /PURGE /XD .svn
"%WIX%bin\heat" dir "%TEMP%\WebHelp" -nologo -sfrag -suid -ag -srd -dir WebHelp -out WebHelp.wxs -cg WebHelpComponent -dr INSTALLLOCATION -var var.WebDeploySourceDir
иҝҳжңүдёҖзӮ№пјҢrobocopyеңЁж”¶иҺ·д№ӢеүҚеүҘзҰ»Subversionе·ҘдҪңеүҜжң¬е…ғж•°жҚ®; -drж №зӣ®еҪ•еј•з”Ёи®ҫзҪ®дёәжҲ‘们зҡ„е®үиЈ…дҪҚзҪ®пјҢиҖҢдёҚжҳҜй»ҳи®Өзҡ„TARGETDIR; -varз”ЁдәҺеҲӣе»әеҸҳйҮҸд»ҘжҢҮе®ҡжәҗзӣ®еҪ•пјҲWebйғЁзҪІиҫ“еҮәпјүгҖӮ
йҖҡиҝҮдҪҝз”ЁStrings.wxlиҝӣиЎҢжң¬ең°еҢ–пјҢеҸҜд»ҘиҪ»жқҫең°е°Ҷдә§е“ҒзүҲжң¬еҢ…еҗ«еңЁж¬ўиҝҺеҜ№иҜқжЎҶж ҮйўҳдёӯгҖӮ пјҲдҝЎз”ЁпјҡsaschabeaumontгҖӮж·»еҠ пјҢеӣ дёәиҝҷдёӘдјҹеӨ§зҡ„жҸҗзӨәйҡҗи—ҸеңЁиҜ„и®әдёӯпјү
<WixLocalization Culture="en-US" xmlns="http://schemas.microsoft.com/wix/2006/localization">
    <String Id="WelcomeDlgTitle">{\WixUI_Font_Bigger}Welcome to the [ProductName] [ProductVersion] Setup Wizard</String>
</WixLocalization>
дёәиҮӘе·ұзңҒеҺ»дёҖдәӣз—ӣиӢҰпјҢ并жҢүз…§жҜҸдёӘж–Ү件зҡ„дёҖдёӘ组件Wim Coehen's adviceиҝӣиЎҢж“ҚдҪңгҖӮиҝҷд№ҹе…Ғи®ёжӮЁйҒ—жјҸпјҲжҲ–йҖҡй…Қз¬Ұ*пјүcomponent GUIDгҖӮ
Rob MenschingжңүдёҖдёӘneat wayпјҢеҸҜд»ҘйҖҡиҝҮжҗңзҙўvalue 3жқҘеҝ«йҖҹи·ҹиёӘMSIж—Ҙеҝ—ж–Ү件дёӯзҡ„й—®йўҳгҖӮиҜ·жіЁж„Ҹжңүе…іеӣҪйҷ…еҢ–зҡ„иҜ„и®әгҖӮ
ж·»еҠ жқЎд»¶еҠҹиғҪж—¶пјҢе°Ҷй»ҳи®ӨеҠҹиғҪзә§еҲ«и®ҫзҪ®дёә0пјҲзҰҒз”Ёпјүжӣҙзӣҙи§ӮпјҢ然еҗҺе°ҶжқЎд»¶зә§еҲ«и®ҫзҪ®дёәжүҖйңҖзҡ„еҖјгҖӮеҰӮжһңжӮЁи®ҫзҪ®й»ҳи®ӨиҰҒзҙ зә§еҲ«пјҶgt; = 1пјҢеҲҷжқЎд»¶зә§еҲ«еҝ…йЎ»дёә0жүҚиғҪе°Ҷе…¶зҰҒз”ЁпјҢиҝҷж„Ҹе‘ізқҖжқЎд»¶йҖ»иҫ‘еҝ…йЎ»дёҺжӮЁжңҹжңӣзҡ„зӣёеҸҚпјҢиҝҷеҸҜиғҪдјҡд»Өдәәеӣ°жғ‘пјҡпјү
<Feature Id="NewInstallFeature" Level="0" Description="New installation feature" Absent="allow">
  <Condition Level="1">NOT UPGRADEFOUND</Condition>
</Feature>
<Feature Id="UpgradeFeature" Level="0" Description="Upgrade feature" Absent="allow">
  <Condition Level="1">UPGRADEFOUND</Condition>
</Feature>
зӯ”жЎҲ 1 :(еҫ—еҲҶпјҡ38)
жЈҖжҹҘжҳҜеҗҰе®үиЈ…дәҶIISпјҡ
<Property Id="IIS_MAJOR_VERSION">
    <RegistrySearch Id="CheckIISVersion" Root="HKLM" Key="SOFTWARE\Microsoft\InetStp" Name="MajorVersion" Type="raw" />
</Property>

<Condition Message="IIS must be installed">
    Installed OR IIS_MAJOR_VERSION
</Condition>
жЈҖжҹҘVista +дёҠжҳҜеҗҰе®үиЈ…дәҶIIS 6е…ғж•°жҚ®еә“е…је®№жҖ§пјҡ
<Property Id="IIS_METABASE_COMPAT">
<RegistrySearch Id="CheckIISMetabase" Root="HKLM" Key="SOFTWARE\Microsoft\InetStp\Components" Name="ADSICompatibility" Type="raw" />
</Property>
<Condition Message="IIS 6 Metabase Compatibility feature must be installed">
Installed OR ((VersionNT < 600) OR IIS_METABASE_COMPAT)
</Condition>
зӯ”жЎҲ 2 :(еҫ—еҲҶпјҡ34)
е°ҶжүҖжңүIDдҝқеӯҳеңЁдёҚеҗҢзҡ„еҗҚз§°з©әй—ҙдёӯ
F.ејҖеӨҙзӨәдҫӢпјҡF.DocumentationпјҢF.BinariesпјҢF.SampleCodeгҖӮ C.ејҖеӨҙExпјҡC.ChmFileпјҢC.ReleaseNotesпјҢC.LicenseFileпјҢC.IniFileпјҢC.Registry CA.дҫӢеҰӮпјҡCA.LaunchHelpпјҢCA.UpdateReadyDlgпјҢCA.SetPropertyX Fi. Di. жҲ‘еҸ‘зҺ°иҝҷжңүеҠ©дәҺи·ҹиёӘжүҖжңүеҗ„з§Қзұ»еҲ«дёӯзҡ„еҗ„з§ҚIDгҖӮ
зӯ”жЎҲ 3 :(еҫ—еҲҶпјҡ25)
еҫҲжЈ’зҡ„й—®йўҳгҖӮжҲ‘еҫҲжғізңӢеҲ°дёҖдәӣжңҖдҪіе®һи·өгҖӮ
жҲ‘еҲҶеҸ‘дәҶеҫҲеӨҡж–Ү件пјҢеӣ жӯӨжҲ‘е°ҶйЎ№зӣ®и®ҫзҪ®дёәеҮ дёӘwxsжәҗж–Ү件гҖӮ
жҲ‘жңүдёҖдёӘйЎ¶зә§жәҗж–Ү件пјҢжҲ‘з§°д№ӢдёәProduct.wxsпјҢе®ғеҹәжң¬дёҠеҢ…еҗ«е®үиЈ…з»“жһ„пјҢдҪҶдёҚеҢ…еҗ«е®һйҷ…组件гҖӮиҜҘж–Ү件жңүеҮ дёӘйғЁеҲҶпјҡ
<Product ...>
  <Package ...>
    <Media>...
   <Condition>s ...
   <Upgrade ..>
   <Directory>
        ...
   </Directory>
   <Feature>
      <ComponentGroupRef ... > A bunch of these that
   </Feature>
   <UI ...>
   <Property...>
   <Custom Actions...>
   <Install Sequences....
  </Package>
</Product>
.wixж–Ү件зҡ„е…¶дҪҷйғЁеҲҶз”ұеҢ…еҗ«ComponentGroupsзҡ„Fragmentsз»„жҲҗпјҢиҝҷдәӣComponentGroupsеңЁProduct.wxsзҡ„Featureж Үи®°дёӯеј•з”ЁгҖӮжҲ‘зҡ„йЎ№зӣ®еҢ…еҗ«дёҖдёӘеҫҲеҘҪзҡ„йҖ»иҫ‘еҲҶз»„пјҢжҲ‘еҲҶеҸ‘зҡ„ж–Ү件
<Fragment>
   <ComponentGroup>
     <ComponentRef>
     ....
    </ComponentGroup>
    <DirectoryRef>
      <Component... for each file
      ....
    </DirectoryRef>
</Fragment>
иҝҷ并дёҚе®ҢзҫҺпјҢжҲ‘зҡ„OOиңҳиӣӣж„ҹи§үжңүзӮ№еҲәз—ӣпјҢеӣ дёәзүҮж®өеҝ…йЎ»еј•з”ЁProduct.wxsж–Ү件дёӯзҡ„еҗҚз§°пјҲдҫӢеҰӮDirectoryRefпјүпјҢдҪҶжҲ‘еҸ‘зҺ°з»ҙжҠӨеҚ•дёӘеӨ§еһӢжәҗж–Ү件жӣҙе®№жҳ“гҖӮ
жҲ‘еҫҲжғіеҗ¬еҲ°жңүе…іжӯӨзҡ„иҜ„и®әпјҢжҲ–иҖ…жҳҜеҗҰжңүдәәд№ҹжңүд»»дҪ•еҘҪзҡ„жҸҗзӨәпјҒ
зӯ”жЎҲ 4 :(еҫ—еҲҶпјҡ20)
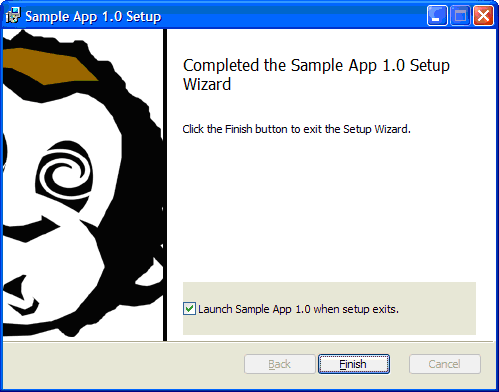
еңЁйҖҖеҮәеҜ№иҜқжЎҶдёӯж·»еҠ дёҖдёӘеӨҚйҖүжЎҶд»ҘеҗҜеҠЁеә”з”ЁжҲ–её®еҠ©ж–Ү件гҖӮ
...
<!-- CA to launch the exe after install -->
<CustomAction Id          ="CA.StartAppOnExit"
              FileKey     ="YourAppExeId"
              ExeCommand  =""
              Execute     ="immediate"
              Impersonate ="yes"
              Return      ="asyncNoWait" />

<!-- CA to launch the help file -->
<CustomAction Id         ="CA.LaunchHelp"
              Directory  ="INSTALLDIR"
              ExeCommand ='[WindowsFolder]hh.exe IirfGuide.chm'
              Execute    ="immediate"
              Return     ="asyncNoWait" />

<Property Id="WIXUI_EXITDIALOGOPTIONALCHECKBOXTEXT"
          Value="Launch MyApp when setup exits." />

<UI>
  <Publish Dialog  ="ExitDialog"
           Control ="Finish"
           Order   ="1"
           Event   ="DoAction"
           Value   ="CA.StartAppOnExit">WIXUI_EXITDIALOGOPTIONALCHECKBOXTEXT</Publish>
</UI>
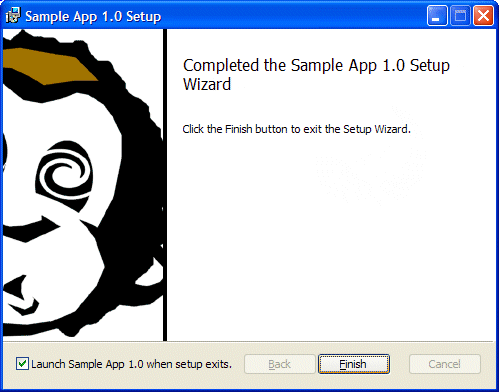
еҰӮжһңдҪ иҝҷж ·еҒҡпјҢвҖңж ҮеҮҶвҖқеӨ–и§ӮдёҚеӨӘеҜ№еҠІгҖӮеӨҚйҖүжЎҶе§Ӣз»ҲдёәзҒ°иүІиғҢжҷҜпјҢиҖҢеҜ№иҜқжЎҶдёәзҷҪиүІпјҡ
и§ЈеҶіиҝҷдёӘй—®йўҳзҡ„ж–№жі•д№ӢдёҖжҳҜspecify your own custom ExitDialog, with a differently-located checkboxгҖӮиҝҷеҸҜиЎҢпјҢдҪҶдјјд№ҺеҸӘжҳҜдёәдәҶж”№еҸҳдёҖдёӘжҺ§д»¶зҡ„йўңиүІеҫҲеӨҡе·ҘдҪңгҖӮи§ЈеҶіеҗҢдёҖй—®йўҳзҡ„еҸҰдёҖз§Қж–№жі•жҳҜеҜ№з”ҹжҲҗзҡ„MSIиҝӣиЎҢеҗҺеӨ„зҗҶпјҢд»Ҙжӣҙж”№зү№е®ҡCheckBoxжҺ§д»¶зҡ„ControlиЎЁдёӯзҡ„XпјҢYеӯ—ж®өгҖӮ javascriptд»Јз ҒеҰӮдёӢжүҖзӨәпјҡ
var msiOpenDatabaseModeTransact = 1;
var filespec = WScript.Arguments(0);
var installer = new ActiveXObject("WindowsInstaller.Installer");
var database = installer.OpenDatabase(filespec, msiOpenDatabaseModeTransact);
var sql = "UPDATE `Control` SET `Control`.`Height` = '18', `Control`.`Width` = '170'," +
          " `Control`.`Y`='243', `Control`.`X`='10' " +
          "WHERE `Control`.`Dialog_`='ExitDialog' AND " +
          "  `Control`.`Control`='OptionalCheckBox'";
var view = database.OpenView(sql);
view.Execute();
view.Close();
database.Commit();
еңЁз”ҹжҲҗMSIд№ӢеҗҺпјҲд»Һlight.exeпјүе°ҶжӯӨд»Јз ҒдҪңдёәе‘Ҫд»ӨиЎҢи„ҡжң¬пјҲдҪҝз”Ёcscript.exeпјүиҝҗиЎҢпјҢе°Ҷз”ҹжҲҗзңӢиө·жқҘжӣҙдё“дёҡзҡ„ExitDialogпјҡ
зӯ”жЎҲ 5 :(еҫ—еҲҶпјҡ18)
з®ҖиҖҢиЁҖд№ӢпјҡдёәжҜҸдёӘе®үиЈ…зЁӢеәҸеҲӣе»әе”ҜдёҖзҡ„UpgradeCodeпјҢ并дёәжҜҸдёӘе®үиЈ…зЁӢеәҸиҮӘеҠЁе®ҡд№үжҜҸдёӘGuidзҡ„第дёҖдёӘеӯ—з¬ҰпјҢеү©дёӢзҡ„31дёӘе”ҜдёҖгҖӮ
зӨәдҫӢConfig.wxi
<?xml version="1.0" encoding="utf-8"?>
<Include>
<!-- Upgrade code should not change unless you want to install
     a new product and have the old product remain installed,
     that is, both products existing as separate instances. -->
<?define UpgradeCode = "YOUR-GUID-HERE" ?>

<!-- Platform specific variables -->
<?if $(var.Platform) = x64 ?>
  <!-- Product name as you want it to appear in Add/Remove Programs-->
  <?define ProductName = "Foo 64 Bit [Live]" ?>
<?else ?>
  <?define ProductName =  "Foo [Live]" ?>
<?endif ?>

<!-- Directory name used as default installation location -->
<?define InstallName = "Foo [Live]" ?>

<!-- Registry key name used to store installation location -->
<?define InstallNameKey = "FooLive" ?>

<?define VDirName = "FooLive" ?>
<?define AppPoolName = "FooLiveAppPool" ?>
<?define DbName = "BlahBlahLive" ?>
</Include>
зӨәдҫӢConfig.Common.wxi
<?xml version="1.0" encoding="utf-8"?>
<Include>
<!-- Auto-generate ProductCode for each build, release and upgrade -->
<?define ProductCode = "*" ?>

<!-- Note that 4th version (Revision) is ignored by Windows Installer -->
<?define ProductVersion = "1.0.0.0" ?>

<!-- Minimum version supported if product already installed and this is an upgrade -->
<!-- Note that 4th version (Revision) is ignored by Windows Installer -->
<?define MinimumUpgradeVersion = "0.0.0.0" ?>

<!-- Platform specific variables -->
<?if $(var.Platform) = x64 ?>
   <?define Win64 = "yes" ?>
   <?define PlatformProgramFilesFolder = "ProgramFiles64Folder" ?>
<?else ?>
   <?define Win64 = "no" ?>
   <?define PlatformProgramFilesFolder = "ProgramFilesFolder" ?>
<?endif ?>

<?define ProductManufacturer = "Foo Technologies"?>

<!-- Decimal Language ID (LCID) for the Product. Used for localization. -->
<?define ProductLanguage = "1033" ?>

<?define WebSiteName = "DefaultWebSite" ?>
<?define WebSitePort = "80" ?>

<?define DbServer = "(local)" ?>
</Include>
зӨәдҫӢComponents.wxs
<?xml version="1.0" encoding="utf-8"?>
<Wix xmlns="http://schemas.microsoft.com/wix/2006/wi">
  <!-- The pre-processor variable which allows the magic to happen :) -->
  <?include $(sys.CURRENTDIR)\Config.wxi?>
  <?include ..\Setup.Library\Config.Common.wxi?>
  <Fragment Id="ComponentsFragment">
    <Directory Id="TARGETDIR" Name="SourceDir">
      <Directory Id="$(var.PlatformProgramFilesFolder)">
        <Directory Id="INSTALLLOCATION" Name="$(var.InstallName)">
          <Component Id="ProductComponent" Guid="0XXXXXXX-XXXX-XXXX-XXXX-XXXXXXXXXXXX" KeyPath="yes">
          ...
жіЁж„ҸпјҡжҲ‘зҺ°еңЁе»әи®®е°ҶGuidеұһжҖ§д»ҺComponentпјҲзӣёеҪ“дәҺ*пјүдёӯеҲ йҷӨпјҢжҜҸдёӘ组件дҪҝз”ЁдёҖдёӘж–Ү件并е°Ҷж–Ү件и®ҫзҪ®дёәkeypathгҖӮиҝҷж ·е°ұж— йңҖи°ғз”ЁдёӢйқўжҳҫзӨәзҡ„ModifyComponentsGuidsе’ҢRevertComponentsGuidsзӣ®ж ҮгҖӮдҪҶжҳҜпјҢжӮЁеҸҜиғҪж— жі•еҜ№жүҖжңү组件иҝӣиЎҢжӯӨж“ҚдҪңгҖӮ
зӨәдҫӢSetup.Live.wixproj
<Import Project="$(MSBuildExtensionsPath)\MSBuildCommunityTasks\MSBuild.Community.Tasks.Targets" />
<Target Name="BeforeBuild">
<CallTarget Targets="ModifyComponentsGuids" />
</Target>
<Target Name="AfterBuild">
<CallTarget Targets="RevertComponentsGuids" />
</Target>
<!-- Modify the first character of every Guid to create unique value for Live, Test and Training builds -->
<Target Name="ModifyComponentsGuids">
<FileUpdate Files="..\Setup.Library\Components.wxs" Regex="Guid="([a-f]|[A-F]|\d)" ReplacementText="Guid="A" />
</Target>
<!-- Revert the first character of every Guid back to initial value -->
<Target Name="RevertComponentsGuids">
<FileUpdate Files="..\Setup.Library\Components.wxs" Regex="Guid="([a-f]|[A-F]|\d)" ReplacementText="Guid="0" />
</Target>
жңҖеҗҺзҡ„жғіжі•
жӣҙж–°1пјҡ Auto-generating component GuidsеҰӮжһңдёәжҜҸдёӘж–Ү件еҲӣе»әGuid =вҖң*вҖқзҡ„组件пјҢе°Ҷж–Ү件и®ҫзҪ®дёәй”®и·Ҝеҫ„пјҢеҲҷж— йңҖи°ғз”ЁFileUpdateд»»еҠЎгҖӮ
жӣҙж–°2пјҡжҲ‘们йҒҮеҲ°зҡ„дёҖдёӘй—®йўҳжҳҜпјҢеҰӮжһңжӮЁдёҚиҮӘеҠЁз”ҹжҲҗ组件Guid并且жһ„е»әеӨұиҙҘпјҢйӮЈд№Ҳдёҙж—¶ж–Ү件йңҖиҰҒжҳҜжүӢеҠЁеҲ йҷӨгҖӮ
жӣҙж–°3пјҡжүҫеҲ°дёҖз§Қж–№жі•жқҘж¶ҲйҷӨеҜ№svnпјҡexternalsе’Ңдёҙж—¶ж–Ү件еҲӣе»әзҡ„дҫқиө–гҖӮиҝҷдҪҝеҫ—жһ„е»әиҝҮзЁӢжӣҙе…·еј№жҖ§пјҲеҰӮжһңжӮЁдёҚиғҪдҪҝз”ЁGuidsйҖҡй…Қз¬ҰпјҢеҲҷжҳҜжңҖдҪійҖүжӢ©пјүпјҢеҰӮжһңеңЁе…үзәҝжҲ–иңЎзғӣдёӯеӯҳеңЁжһ„е»әеӨұиҙҘпјҢеҲҷдёҚдјҡйӮЈд№Ҳи„ҶејұгҖӮ
жӣҙж–°4 пјҡдҪҝз”Ёе®һдҫӢиҪ¬жҚўеҜ№Multiple Instancesзҡ„ж”ҜжҢҒеңЁWiX 3.0+дёӯпјҢз»қеҜ№еҖјеҫ—дёҖзңӢгҖӮ
зӯ”жЎҲ 6 :(еҫ—еҲҶпјҡ17)
дҪҝз”ЁMsiиҜҠж–ӯж—Ҙеҝ—и®°еҪ•иҺ·еҸ–иҜҰз»Ҷзҡ„ж•…йҡңдҝЎжҒҜ
msiexec /i Package.msi /l*v c:\Package.log
е…¶дёӯ
Package.msiжҳҜжӮЁзҡ„еҢ…иЈ№зҡ„еҗҚз§° 并且
c:\Package.logжҳҜжӮЁеёҢжңӣиҫ“еҮәж—Ҙеҝ—зҡ„дҪҚзҪ®
Wixд»Ӣз»Қи§Ҷйў‘
Oh and Random Wix intro video featuring "Mr. WiX" Rob Mensching is "conceptual big picture" helpful.
зӯ”жЎҲ 7 :(еҫ—еҲҶпјҡ17)
дҪҝз”ЁJavascript CustomActionsпјҢеӣ дёәе®ғ们йқһеёёе®№жҳ“
дәә们已з»ҸиҜҙJavascript is the wrong thing to use for MSI CustomActionsгҖӮз»ҷеҮәзҡ„зҗҶз”ұпјҡйҡҫд»Ҙи°ғиҜ•пјҢйҡҫд»ҘдҪҝе…¶еҸҜйқ гҖӮжҲ‘дёҚеҗҢж„ҸгҖӮи°ғиҜ•е№¶дёҚйҡҫпјҢеҪ“然д№ҹдёҚжҜ”C ++жӣҙйҡҫгҖӮе®ғдёҺдј—дёҚеҗҢгҖӮжҲ‘еҸ‘зҺ°еңЁJavascriptдёӯзј–еҶҷCustomActionsжҜ”дҪҝз”ЁC ++жӣҙе®№жҳ“пјҢжӣҙе®№жҳ“гҖӮеҝ«еӨҡдәҶгҖӮеҗҢж ·еҸҜйқ гҖӮ
еҸӘжңүдёҖдёӘзјәзӮ№пјҡJavascript CustomActionsеҸҜд»ҘйҖҡиҝҮOrcaжҸҗеҸ–пјҢиҖҢC / C ++ CAеҲҷйңҖиҰҒйҖҶеҗ‘е·ҘзЁӢгҖӮеҰӮжһңжӮЁи®ӨдёәжӮЁзҡ„е®үиЈ…зЁӢеәҸйӯ”жі•жҳҜеҸ—дҝқжҠӨзҡ„зҹҘиҜҶдә§жқғпјҢжӮЁе°ҶйңҖиҰҒйҒҝе…ҚдҪҝз”Ёи„ҡжң¬гҖӮ
еҰӮжһңдҪ дҪҝз”Ёи„ҡжң¬пјҢ дҪ еҸӘйңҖиҰҒд»ҺдёҖдәӣз»“жһ„ејҖе§ӢгҖӮиҝҷйҮҢжңүдёҖдәӣи®©дҪ е…Ҙй—ЁгҖӮ
CustomActionзҡ„JavascriptвҖңж ·жқҝд»Јз ҒвҖқпјҡ
//
// CustomActions.js
//
// Template for WIX Custom Actions written in Javascript.
//
//
// Mon, 23 Nov 2009  10:54
//
// ===================================================================


// http://msdn.microsoft.com/en-us/library/sfw6660x(VS.85).aspx
var Buttons = {
        OkOnly           : 0,
        OkCancel         : 1,
        AbortRetryIgnore : 2,
        YesNoCancel      : 3
};

var Icons = {
        Critical         : 16,
        Question         : 32,
        Exclamation      : 48,
        Information      : 64
};

var MsgKind = {
        Error            : 0x01000000,
        Warning          : 0x02000000,
        User             : 0x03000000,
        Log              : 0x04000000
};

// http://msdn.microsoft.com/en-us/library/aa371254(VS.85).aspx
var MsiActionStatus = {
        None             : 0,
        Ok               : 1, // success
        Cancel           : 2,
        Abort            : 3,
        Retry            : 4, // aka suspend?
        Ignore           : 5  // skip remaining actions; this is not an error.
};


function MyCustomActionInJavascript_CA() {
    try {
        LogMessage("Hello from MyCustomActionInJavascript");
        // ...do work here...
        LogMessage("Goodbye from MyCustomActionInJavascript");
    }
    catch (exc1) {
        Session.Property("CA_EXCEPTION") = exc1.message ;
        LogException(exc1);
        return MsiActionStatus.Abort;
    }
    return MsiActionStatus.Ok;
}

// Pop a message box.  also spool a message into the MSI log, if it is enabled.
function LogException(exc) {
    var record = Session.Installer.CreateRecord(0);
    record.StringData(0) = "CustomAction: Exception: 0x" + decimalToHexString(exc.number) + " : " + exc.message;
    Session.Message(MsgKind.Error + Icons.Critical + Buttons.btnOkOnly, record);
}


// spool an informational message into the MSI log, if it is enabled.
function LogMessage(msg) {
    var record = Session.Installer.CreateRecord(0);
    record.StringData(0) = "CustomAction:: " + msg;
    Session.Message(MsgKind.Log, record);
}


// http://msdn.microsoft.com/en-us/library/d5fk67ky(VS.85).aspx
var WindowStyle = {
    Hidden : 0,
    Minimized : 1,
    Maximized : 2
};

// http://msdn.microsoft.com/en-us/library/314cz14s(v=VS.85).aspx
var OpenMode = {
    ForReading : 1,
    ForWriting : 2,
    ForAppending : 8
};

// http://msdn.microsoft.com/en-us/library/a72y2t1c(v=VS.85).aspx
var SpecialFolders = {
    WindowsFolder : 0,
    SystemFolder :  1,
    TemporaryFolder : 2
};

// Run a command via cmd.exe from within the MSI
function RunCmd(command)
{
    var wshell = new ActiveXObject("WScript.Shell");
    var fso = new ActiveXObject("Scripting.FileSystemObject");
    var tmpdir = fso.GetSpecialFolder(SpecialFolders.TemporaryFolder);
    var tmpFileName = fso.BuildPath(tmpdir, fso.GetTempName());

    LogMessage("shell.Run("+command+")");

    // use cmd.exe to redirect the output
    var rc = wshell.Run("%comspec% /c " + command + "> " + tmpFileName, WindowStyle.Hidden, true);
    LogMessage("shell.Run rc = "  + rc);

    // here, optionally parse the output of the command
    if (parseOutput) {
        var textStream = fso.OpenTextFile(tmpFileName, OpenMode.ForReading);
        while (!textStream.AtEndOfStream) {
            var oneLine = textStream.ReadLine();
            var line = ParseOneLine(oneLine);
                ...
        }
        textStream.Close();
    }

    if (deleteOutput) {
        fso.DeleteFile(tmpFileName);
    }

    return {
        rc : rc,
        outputfile : (deleteOutput) ? null : tmpFileName
    };
}
然еҗҺпјҢдҪҝз”Ёд»ҘдёӢеҶ…е®№жіЁеҶҢиҮӘе®ҡд№үж“ҚдҪңпјҡ
<Fragment>
  <Binary Id="IisScript_CA" SourceFile="CustomActions.js" />

  <CustomAction Id="CA.MyCustomAction"
              BinaryKey="IisScript_CA"
              JScriptCall="MyCustomActionInJavascript_CA"
              Execute="immediate"
              Return="check" />
</Fragmemt>
еҪ“然пјҢжӮЁеҸҜд»ҘдёәеӨҡдёӘиҮӘе®ҡд№үж“ҚдҪңжҸ’е…Ҙд»»ж„Ҹж•°йҮҸзҡ„JavascriptеҮҪж•°гҖӮдёҖдёӘдҫӢеӯҗпјҡжҲ‘дҪҝз”ЁJavascriptеңЁIISдёҠиҝӣиЎҢWMIжҹҘиҜўпјҢд»ҘиҺ·еҸ–еҸҜд»Ҙе®үиЈ…ISAPIиҝҮж»ӨеҷЁзҡ„зҺ°жңүзҪ‘з«ҷеҲ—иЎЁгҖӮ然еҗҺдҪҝз”ЁжӯӨеҲ—иЎЁеЎ«е……зЁҚеҗҺеңЁUIеәҸеҲ—дёӯжҳҫзӨәзҡ„еҲ—иЎЁжЎҶгҖӮдёҖеҲҮйғҪеҫҲе®№жҳ“гҖӮ
еңЁIIS7дёҠпјҢжІЎжңүйҖӮз”ЁдәҺIISзҡ„WMIжҸҗдҫӣзЁӢеәҸпјҢеӣ жӯӨжҲ‘дҪҝз”Ёshell.Run()ж–№жі•и°ғз”Ёappcmd.exeжқҘжү§иЎҢе·ҘдҪңгҖӮе®№жҳ“гҖӮ
зӣёе…ій—®йўҳпјҡAbout Javascript CustomActions
зӯ”жЎҲ 8 :(еҫ—еҲҶпјҡ12)
жҲ‘еҫҲжғҠ讶没жңүдәәжҸҗеҲ°дҪҝз”ЁT4еңЁжһ„е»әжңҹй—ҙз”ҹжҲҗWXSж–Ү件гҖӮжҲ‘йҖҡиҝҮHenry Lee @ New Age SolutionsдәҶи§ЈеҲ°иҝҷдёҖзӮ№гҖӮ
еҹәжң¬дёҠпјҢжӮЁеҲӣе»әдёҖдёӘиҮӘе®ҡд№үMSBuildд»»еҠЎжқҘжү§иЎҢT4жЁЎжқҝпјҢиҜҘжЁЎжқҝеңЁWixйЎ№зӣ®зј–иҜ‘д№ӢеүҚиҫ“еҮәWXSгҖӮиҝҷе…Ғи®ёжӮЁпјҲеҸ–еҶідәҺжӮЁеҰӮдҪ•е®һзҺ°е®ғпјүиҮӘеҠЁеҢ…еҗ«зј–иҜ‘еҸҰдёҖдёӘи§ЈеҶіж–№жЎҲзҡ„жүҖжңүзЁӢеәҸйӣҶиҫ“еҮәпјҲиҝҷж„Ҹе‘ізқҖжӮЁдёҚеҶҚйңҖиҰҒеңЁж·»еҠ ж–°зЁӢеәҸйӣҶж—¶зј–иҫ‘wxпјүгҖӮ
зӯ”жЎҲ 9 :(еҫ—еҲҶпјҡ12)
дҪҝз”ЁHeat.exeзІүзўҺи„ёйғЁе№¶еңЁз—ӣиӢҰзҡ„еӨ§еһӢе®үиЈ…дёҠйҖ жҲҗвҖңEpic PwnageвҖқ
жү©еұ•Si'sе’Ң
Robert-P'sе…ідәҺзғӯйҮҸзҡ„зӯ”жЎҲгҖӮ
зҝ»иҜ‘пјҡ
пјҲдҪҝз”ЁзғӯйҮҸжқҘйҒҝе…ҚжүӢеҠЁе°ҶеҚ•дёӘж–Ү件键е…ҘйЎ№зӣ®пјҢ并иҮӘеҠЁеҢ–жһ„е»әд»Ҙе®һзҺ°ж•ҙдҪ“жӣҙз®ҖеҚ•зҡ„иҝҮзЁӢгҖӮпјү
WiX 2.0 Heat Syntax detailed
еҜ№дәҺиҫғж–°зҡ„зүҲжң¬пјҲ并йқһдёҺж—§зүҲжң¬жңүжүҖдёҚеҗҢпјҢдҪҶеҸҜиғҪдјҡжңүд»ӨдәәзғҰжҒјзҡ„иҜӯжі•жӣҙж”№....пјүд»Һcmd.exeиҝӣе…Ҙзӣ®еҪ•Heat并иҫ“е…ҘеҠ зғӯпјҢдҪҶжҲ‘жңүдёҖдёӘдҫӢеӯҗеҰӮжһңйңҖиҰҒпјҢеҸҜд»ҘеңЁиҝҷйҮҢиҺ·еҫ—жӣҙж–°зүҲжң¬зҡ„её®еҠ©гҖӮ
е°Ҷд»ҘдёӢеҶ…е®№ж·»еҠ еҲ°visual studio 2010дёӯзҡ„жһ„е»әдәӢ件дёӯ
пјҲеҸій”®еҚ•еҮ»йЎ№зӣ® - пјҶgt;еұһжҖ§ - пјҶgt;жһ„е»әдәӢ件 - пјҶgt;йў„жһ„е»әдәӢ件пјү
$(WIX)bin\heat.exe" dir "$(EnviromentVariable)" -cg GroupVariable -gg -scom -sreg -sfrag -
srd -dr INSTALLLOCATION -var env.LogicPath -out "$(FragmentDir)\FileName.wxs
-gg
еңЁеҠ зғӯж—¶з”ҹжҲҗGuidsпјҲеҰӮжү§иЎҢдёҠиҝ°е‘Ҫд»Өж—¶пјү
-scom
дёҚиҰҒжҠ“еҸ–вҖңCOMж–Ү件вҖқ
-sreg
дёҚиҰҒжҠ“еҸ–вҖңжіЁеҶҢиЎЁж–Ү件вҖқ
-sfrag
дёҚиҰҒжҠ“дҪҸвҖңзўҺзүҮвҖқ
-srd
дёҚиҰҒжҠ“дҪҸвҖңж №зӣ®еҪ•вҖқ
dir
dirиЎЁзӨәжӮЁеёҢжңӣHeatжҹҘзңӢж–Ү件еӨ№
"$(EnviromentVariable)"
жӮЁе°Ҷж·»еҠ еҲ°пјҲеҸій”®еҚ•еҮ»йЎ№зӣ®пјҢиҪ¬еҲ°еұһжҖ§пјүйЎ№зӣ®еұһжҖ§дёӯзҡ„йў„еӨ„зҗҶеҷЁеҸҳйҮҸзҡ„еҗҚз§° - пјҶgt;жһ„е»әйғЁеҲҶпјҢе…¶дёӯжҳҫзӨәе®ҡд№үйў„еӨ„зҗҶеҷЁеҸҳйҮҸпјҲеҒҮе®ҡVisual Studio 2010пјү
Example: EnviromentVariable=C:\Project\bin\Debug;жІЎжңүеҸҢеј•еҸ·дҪҶд»ҘеҲҶеҸ·з»“е°ҫ
-cg GroupVariable
е°Ҷд»ҺеҲӣе»әеҲ°дё»wxsж–Ү件зҡ„зүҮж®өеј•з”Ёзҡ„ComponentGroup
FragmentDir
е°ҶеӯҳеӮЁиҫ“еҮәwxsзүҮж®өзҡ„зүҮж®өзӣ®еҪ•
FileName.wxs
ж–Ү件еҗҚ
иҝҷйҮҢжңүе®Ңж•ҙзҡ„ж•ҷзЁӢпјҢжүҖд»Ҙйқһеёёжңүз”Ё
зӯ”жЎҲ 10 :(еҫ—еҲҶпјҡ12)
Peter Tateе·Із»Ҹеұ•зӨәдәҶеҰӮдҪ•еңЁеҚ•зӢ¬зҡ„wixзүҮж®өдёӯе®ҡд№үеҸҜйҮҚз”Ёзҡ„ComponentGroupе®ҡд№үгҖӮдёҺжӯӨзӣёе…ізҡ„дёҖдәӣйўқеӨ–жҠҖе·§пјҡ
зӣ®еҪ•еҲ«еҗҚ
组件组зүҮж®өдёҚйңҖиҰҒзҹҘйҒ“дё»дә§е“Ғwxsе®ҡд№үзҡ„зӣ®еҪ•гҖӮеңЁз»„件组зүҮж®өдёӯпјҢжӮЁеҸҜд»Ҙи®Ёи®әеҰӮдёӢж–Ү件еӨ№пјҡ
<DirectoryRef Id="component1InstallFolder">
...
</DirectoryRef>
然еҗҺдё»дә§е“ҒеҸҜд»Ҙе°Ҷе…¶зӣ®еҪ•д№ӢдёҖпјҲдҫӢеҰӮвҖңproductInstallFolderвҖқпјүжӣҝжҚўдёәпјҡ
<Directory Id="productInstallFolder" Name="ProductName">
   <!-- not subfolders (because no Name attribute) but aliases for parent! -->
   <Directory Id="component1InstallFolder"/>
   <Directory Id="component2InstallFolder"/>
</Directory>
дҫқиө–е…ізі»еӣҫ
ComponentGroupе…ғзҙ еҸҜд»ҘеҢ…еҗ«ComponentGroupRefеӯҗе…ғзҙ гҖӮеҰӮжһңжӮЁжңүдёҖеӨ§е ҶеҸҜйҮҚ用组件пјҢ并且е®ғ们д№Ӣй—ҙе…·жңүеӨҚжқӮзҡ„дҫқиө–е…ізі»еӣҫпјҢйӮЈд№Ҳиҝҷйқһеёёжңүз”ЁгҖӮжӮЁеҸӘйңҖеңЁжҜҸдёӘ组件зҡ„иҮӘе·ұзҡ„зүҮж®өдёӯи®ҫзҪ®дёҖдёӘComponentGroupпјҢ并声жҳҺдҫқиө–е…ізі»пјҢеҰӮдёӢжүҖзӨәпјҡ
<ComponentGroup Id="B">
   <ComponentRef Id="_B" />
   <ComponentGroupRef Id="A">
</ComponentGroup>
еҰӮжһңжӮЁзҺ°еңЁеңЁи®ҫзҪ®дёӯ引用组件组вҖңBвҖқпјҢеӣ дёәе®ғжҳҜжӮЁзҡ„еә”з”ЁзЁӢеәҸзҡ„зӣҙжҺҘдҫқиө–йЎ№пјҢе®ғе°ҶиҮӘеҠЁжӢүе…Ҙ组件组вҖңAвҖқпјҢеҚідҪҝеә”з”ЁзЁӢеәҸдҪңиҖ…д»ҺжңӘж„ҸиҜҶеҲ°е®ғжҳҜвҖңBвҖқзҡ„дҫқиө–йЎ№вҖқгҖӮеҸӘиҰҒдҪ жІЎжңүд»»дҪ•еҫӘзҺҜдҫқиө–пјҢе®ғе°ұвҖңжӯЈеёёе·ҘдҪңвҖқгҖӮ
еҸҜйҮҚеӨҚдҪҝз”Ёзҡ„wixlib
еҰӮжһңдҪҝз”Ёlit.exeе°Ҷbig-pool-o-reusable-componentsзј–иҜ‘дёәеҸҜйҮҚз”Ёзҡ„wixlibпјҢеҲҷдёҠиҝ°дҫқиө–е…ізі»еӣҫзҡ„жҖқи·Ҝж•ҲжһңжңҖдҪігҖӮеңЁеҲӣе»әеә”з”ЁзЁӢеәҸи®ҫзҪ®ж—¶пјҢжӮЁеҸҜд»ҘеғҸwixobjж–Ү件дёҖж ·еј•з”ЁжӯӨwixlibгҖӮ candle.exeй“ҫжҺҘеҷЁе°ҶиҮӘеҠЁж¶ҲйҷӨдё»дә§е“Ғwxsж–Ү件жңӘвҖңжӢүе…ҘвҖқзҡ„д»»дҪ•зүҮж®өгҖӮ
зӯ”жЎҲ 11 :(еҫ—еҲҶпјҡ9)
еҢ…жӢ¬COMеҜ№иұЎпјҡ
heatз”ҹжҲҗжүҖжңүеӨ§еӨҡж•°пјҲеҰӮжһңдёҚжҳҜе…ЁйғЁпјүжіЁеҶҢиЎЁйЎ№д»ҘеҸҠе®ғ们жүҖйңҖзҡ„е…¶д»–й…ҚзҪ®гҖӮйЈҳжҹ”пјҒ
еҢ…жӢ¬жүҳз®ЎCOMеҜ№иұЎпјҲеҸҲеҗҚ.NETжҲ–CпјғCOMеҜ№иұЎпјү
еңЁжүҳз®ЎCOMеҜ№иұЎдёҠдҪҝз”Ёheatе°ҶдёәжӮЁжҸҗдҫӣеҮ д№Һе®Ңж•ҙзҡ„wixж–ҮжЎЈгҖӮ
еҰӮжһңжӮЁдёҚйңҖиҰҒGACдёӯжҸҗдҫӣзҡ„еә“пјҲеҚіпјҢе…ЁеұҖеҸҜз”ЁпјҡеӨ§еӨҡж•°ж—¶еҖҷжӮЁиҝҳдёҚйңҖиҰҒдҪҝз”Ё.NETзЁӢеәҸйӣҶ - еҰӮжһңдёҚжҳҜиҝҷж ·зҡ„иҜқпјҢжӮЁеҸҜиғҪеңЁиҝҷдёҖзӮ№дёҠеҒҡй”ҷдәҶжү“з®—жҲҗдёәе…ұдә«еә“пјүжӮЁйңҖиҰҒзЎ®дҝқжӣҙж–°CodeBaseжіЁеҶҢиЎЁйЎ№д»Ҙи®ҫзҪ®дёә[#ComponentName]гҖӮеҰӮжһңжӮЁи®ЎеҲ’е°Ҷе…¶е®үиЈ…еҲ°GACпјҲдҫӢеҰӮпјҢжӮЁе·Із»ҸеҲӣе»әдәҶдёҖдәӣжҜҸдёӘдәәйғҪжғіиҰҒдҪҝз”Ёзҡ„ж–°зҡ„е…¬е…ұеә“пјүпјҢеҲҷеҝ…йЎ»еҲ йҷӨжӯӨжқЎзӣ®пјҢ并еҗ‘Fileе…ғзҙ ж·»еҠ дёӨдёӘж–°еұһжҖ§пјҡ{ {1}}е’ҢAssemblyгҖӮзЁӢеәҸйӣҶеә”и®ҫзҪ®дёәвҖң.netвҖқпјҢKeyPathеә”и®ҫзҪ®дёәвҖңжҳҜвҖқгҖӮ
дҪҶжҳҜпјҢжҹҗдәӣзҺҜеўғпјҲе°Өе…¶жҳҜе…·жңүжүҳз®ЎеҶ…еӯҳзҡ„д»»дҪ•зҺҜеўғпјҢеҰӮи„ҡжң¬иҜӯиЁҖпјүд№ҹйңҖиҰҒи®ҝй—®TypelibгҖӮ Make sure to run heat on your typelib并еҢ…еҗ«е®ғгҖӮ KeyPathе°Ҷз”ҹжҲҗжүҖжңүеҝ…йңҖзҡ„жіЁеҶҢиЎЁйЎ№гҖӮиҝҷжңүеӨҡй…·пјҹ
зӯ”жЎҲ 12 :(еҫ—еҲҶпјҡ8)
е®үиЈ…еҲ°C:\ProductName
жҹҗдәӣеә”з”ЁзЁӢеәҸйңҖиҰҒе®үиЈ…еҲ°C:\ProductNameжҲ–зұ»дјјзҡ„дёңиҘҝпјҢдҪҶ99.9пј…пјҲеҰӮжһңдёҚжҳҜ100пј…пјүзҡ„зҪ‘з»ңе®үиЈ…зӨәдҫӢC:\Program Files\CompanyName\ProductNameгҖӮ
д»ҘдёӢд»Јз ҒеҸҜз”ЁдәҺе°ҶTARGETDIRеұһжҖ§и®ҫзҪ®дёәC:й©ұеҠЁеҷЁзҡ„ж №зӣ®еҪ•пјҲеҸ–иҮӘWiX-users listпјүпјҡ
<CustomAction Id="AssignTargetDir" Property="TARGETDIR" Value="C:\" Execute="firstSequence" />
<InstallUISequence>
    <Custom Action="AssignTargetDir" Before="CostInitialize">TARGETDIR=""</Custom>
</InstallUISequence>
<InstallExecuteSequence>
    <Custom Action="AssignTargetDir" Before="CostInitialize">TARGETDIR=""</Custom>
</InstallExecuteSequence>
жіЁж„Ҹпјҡй»ҳи®Өжғ…еҶөдёӢпјҢTARGETDIR дёҚжҢҮеҗ‘C:\пјҒе®ғжҢҮеҗ‘ROOTDRIVEпјҢиҖҢC:еҸҲжҢҮеҗ‘е…·жңүжңҖеӨҡеҸҜз”Ёз©әй—ҙзҡ„й©ұеҠЁеҷЁзҡ„ж №пјҲsee hereпјү - иҝҷдёҚдёҖе®ҡжҳҜ<Product ...>й©ҫ驶гҖӮеҸҜиғҪжңүеҸҰдёҖдёӘзЎ¬зӣҳй©ұеҠЁеҷЁпјҢеҲҶеҢәжҲ–USBй©ұеҠЁеҷЁпјҒ
然еҗҺпјҢеңЁ<Directory Id="TARGETDIR" Name="SourceDir">
<Directory Id="APPLICATIONFOLDER" Name="$(var.ProductName)">
<!-- your content goes here... -->
</Directory>
</Directory>
ж Үи®°дёӢж–№зҡ„жҹҗеӨ„пјҢжӮЁйңҖиҰҒз…§еёёдҪҝз”Ёд»ҘдёӢзӣ®еҪ•ж Үи®°пјҡ
{{1}}
зӯ”жЎҲ 13 :(еҫ—еҲҶпјҡ7)
зҺҜеўғеҸҳйҮҸ
е°ҶWxsж–ҮжЎЈзј–иҜ‘дёәwixobjд»Јз Ғж—¶пјҢеҸҜд»ҘдҪҝз”ЁзҺҜеўғеҸҳйҮҸжқҘзЎ®е®ҡеҗ„з§ҚдҝЎжҒҜгҖӮдҫӢеҰӮпјҢеҒҮи®ҫжӮЁиҰҒжӣҙж”№йЎ№зӣ®дёӯеҢ…еҗ«зҡ„ж–Ү件гҖӮеҒҮи®ҫжӮЁжңүдёҖдёӘеҗҚдёәRELEASE_MODEзҡ„зҺҜеўғеҸҳйҮҸпјҢжӮЁеҸҜд»ҘеңЁжһ„е»әMSIд№ӢеүҚиҝӣиЎҢи®ҫзҪ®пјҲдҪҝз”Ёи„ҡжң¬жҲ–жүӢеҠЁпјҢж— е…ізҙ§иҰҒпјүеңЁwixжәҗд»Јз ҒдёӯпјҢжӮЁеҸҜд»Ҙжү§иЎҢд»ҘдёӢж“ҚдҪңпјҡ
<define FILESOURCE = c:\source\output\bin\$(env.RELEASE_MODE) >
然еҗҺеңЁжӮЁзҡ„д»Јз ҒдёӯпјҢдҪҝз”Ёе®ғжқҘеҠЁжҖҒжӣҙж”№жӮЁзҡ„wxsж–ҮжЎЈпјҢдҫӢеҰӮпјҡ
<Icon Id="myicon.ico" SourceFile="$(var.FILESOURCE)" />
зӯ”жЎҲ 14 :(еҫ—еҲҶпјҡ7)
зј–иҫ‘еҜ№иҜқжЎҶ
зј–иҫ‘еҜ№иҜқжЎҶзҡ„дёҖдёӘеҫҲеҘҪзҡ„еҠҹиғҪжҳҜеңЁзүҲжң¬4.0.1.7090пјҲжҲ–жӣҙй«ҳзүҲжң¬пјүдёӯдҪҝз”ЁSharpDevelopгҖӮеҖҹеҠ©жӯӨе·Ҙе…·пјҢеҸҜд»ҘеңЁвҖңи®ҫи®ЎвҖқи§Ҷеӣҫдёӯжү“ејҖпјҢйў„и§Ҳе’Ңзј–иҫ‘зӢ¬з«ӢеҜ№иҜқжЎҶпјҲжқҘиҮӘWiXжәҗзҡ„wxsж–Ү件пјҢдҫӢеҰӮInstallDirDlg.wxsпјүгҖӮ
зӯ”жЎҲ 15 :(еҫ—еҲҶпјҡ7)
дёәжІЎжңүVotiveзҡ„жүҳз®Ўд»Јз ҒпјҲCпјғпјүзј–еҶҷзҡ„WIXеҲӣе»әиҮӘе®ҡд№үж“ҚдҪң
зӯ”жЎҲ 16 :(еҫ—еҲҶпјҡ7)
дҪҝз”ЁRobMзү№ж®ҠвҖңи®°дҪҸеұһжҖ§вҖқжЁЎејҸ
http://robmensching.com/blog/posts/2010/5/2/The-WiX-toolsets-Remember-Property-pattern
зӯ”жЎҲ 17 :(еҫ—еҲҶпјҡ6)
и®ҫзҪ®IIS enable32BitAppOnWin64ж Үеҝ—http://trycatchfail.com/blog/post/WiX-Snippet-change-enable32BitAppOnWin64.aspx
<InstallExecuteSequence>
   <RemoveExistingProducts After="InstallFinalize" />
   <Custom Action="ConfigureAppPool" After="InstallFinalize" >
     <![CDATA[NOT Installed AND VersionNT64 >= 600]]>
   </Custom>
</InstallExecuteSequence>

<CustomAction Id="ConfigureAppPool" Return="check" Directory="TARGETDIR" ExeCommand="[SystemFolder]inetsrv\appcmd set apppool /apppool.name:[APPPOOLNAME] /enable32BitAppOnWin64:false" />
зӯ”жЎҲ 18 :(еҫ—еҲҶпјҡ5)
дҝ®ж”№вҖңеҮҶеӨҮе®үиЈ…пјҹвҖқеҜ№иҜқжЎҶпјҲеҸҲеҗҚVerifyReadyDlgпјүжҸҗдҫӣжүҖеҒҡйҖүжӢ©зҡ„ж‘ҳиҰҒгҖӮ
зңӢиө·жқҘеғҸиҝҷж ·пјҡ
alt text http://i46.tinypic.com/s4th7t.jpg
дҪҝз”ЁJavascript CustomActionжү§иЎҢжӯӨж“ҚдҪңпјҡ
Javascriptд»Јз Ғпјҡ
// http://msdn.microsoft.com/en-us/library/aa372516(VS.85).aspx
var MsiViewModify =
    {
        Refresh          : 0,
        Insert           : 1,
        Update           : 2,
        Assign           : 3,
        Replace          : 4,
        Merge            : 5,
        Delete           : 6,
        InsertTemporary  : 7,   // cannot permanently modify the MSI during install
        Validate         : 8,
        ValidateNew      : 9,
        ValidateField    : 10,
        ValidateDelete   : 11
    };


// http://msdn.microsoft.com/en-us/library/sfw6660x(VS.85).aspx
var Buttons =
    {
        OkOnly           : 0,
        OkCancel         : 1,
        AbortRetryIgnore : 2,
        YesNoCancel      : 3
    };

var Icons=
    {
        Critical         : 16,
        Question         : 32,
        Exclamation      : 48,
        Information      : 64
    }

var MsgKind =
    {
        Error            : 0x01000000,
        Warning          : 0x02000000,
        User             : 0x03000000,
        Log              : 0x04000000
    };

// http://msdn.microsoft.com/en-us/library/aa371254(VS.85).aspx
var MsiActionStatus =
    {
        None             : 0,
        Ok               : 1, // success
        Cancel           : 2,
        Abort            : 3,
        Retry            : 4, // aka suspend?
        Ignore           : 5  // skip remaining actions; this is not an error.
    };

function UpdateReadyDialog_CA(sitename)
{
    try
    {
        // can retrieve properties from the install session like this:
        var selectedWebSiteId = Session.Property("MSI_PROPERTY_HERE");

        // can retrieve requested feature install state like this:
        var fInstallRequested   = Session.FeatureRequestState("F.FeatureName");

        var text1 = "This is line 1 of text in the VerifyReadyDlg";

        var text2 = "This is the second line of custom text";

        var controlView     = Session.Database.OpenView("SELECT * FROM Control");
        controlView.Execute();

        var rec             = Session.Installer.CreateRecord(12);
        rec.StringData(1)   = "VerifyReadyDlg";    // Dialog_
        rec.StringData(2)   = "CustomVerifyText1"; // Control - can be any name
        rec.StringData(3)   = "Text";              // Type
        rec.IntegerData(4)  = 25;                  // X
        rec.IntegerData(5)  = 60;                  // Y
        rec.IntegerData(6)  = 320;                 // Width
        rec.IntegerData(7)  = 85;                  // Height
        rec.IntegerData(8)  = 2;                   // Attributes
        rec.StringData(9)   = "";                  // Property
        rec.StringData(10)  = vText1;              // Text
        rec.StringData(11)  = "";                  // Control_Next
        rec.StringData(12)  = "";                  // Help
        controlView.Modify(MsiViewModify.InsertTemporary, rec);

        rec                 = Session.Installer.CreateRecord(12);
        rec.StringData(1)   = "VerifyReadyDlg";    // Dialog_
        rec.StringData(2)   = "CustomVerifyText2"; // Control - any unique name
        rec.StringData(3)   = "Text";              // Type
        rec.IntegerData(4)  = 25;                  // X
        rec.IntegerData(5)  = 160;                 // Y
        rec.IntegerData(6)  = 320;                 // Width
        rec.IntegerData(7)  = 65;                  // Height
        rec.IntegerData(8)  = 2;                   // Attributes
        rec.StringData(9)   = "";                  // Property
        rec.StringData(10)  = text2;               // Text
        rec.StringData(11)  = "";                  // Control_Next
        rec.StringData(12)  = "";                  // Help
        controlView.Modify(MsiViewModify.InsertTemporary, rec);

        controlView.Close();
    }
    catch (exc1)
    {
        Session.Property("CA_EXCEPTION") = exc1.message ;
        LogException("UpdatePropsWithSelectedWebSite", exc1);
        return MsiActionStatus.Abort;
    }
    return MsiActionStatus.Ok;
}


function LogException(loc, exc)
{
    var record = Session.Installer.CreateRecord(0);
    record.StringData(0) = "Exception {" + loc + "}: " + exc.number + " : " + exc.message;
    Session.Message(MsgKind.Error + Icons.Critical + Buttons.btnOkOnly, record);
}
еЈ°жҳҺJavascript CAпјҡ
<Fragment>
  <Binary Id="IisScript_CA" SourceFile="CustomActions.js" />

  <CustomAction Id="CA.UpdateReadyDialog"
              BinaryKey="IisScript_CA"
              JScriptCall="UpdateReadyDialog_CA"
              Execute="immediate"
              Return="check" />
</Fragment>
е°ҶCAйҷ„еҠ еҲ°жҢүй’®гҖӮеңЁжӯӨзӨәдҫӢдёӯпјҢд»ҺCustomizeDlgпјҡ
еҚ•еҮ»Nextж—¶е°Ҷи§ҰеҸ‘CA.<UI ...>
<Publish Dialog="CustomizeDlg" Control="Next" Event="DoAction"
Value="CA.UpdateReadyDialog" Order="1"/>
</UI>
зӣёе…іSOй—®йўҳпјҡHow can I set, at runtime, the text to be displayed in VerifyReadyDlg?
зӯ”жЎҲ 19 :(еҫ—еҲҶпјҡ5)
еңЁйғЁзҪІе®үиЈ…еҢ…д№ӢеүҚпјҢжҲ‘жҖ»жҳҜжҺ§еҲ¶е®ғзҡ„еҶ…е®№гҖӮ
иҝҷеҸӘжҳҜеңЁе‘Ҫд»ӨиЎҢдёҠзҡ„дёҖдёӘз®ҖеҚ•и°ғз”ЁпјҲж №жҚ®Terrencesеё–еӯҗпјүжү“ејҖе‘Ҫд»ӨиЎҢ并иҫ“е…Ҙ
msiexec /a Package.msi /qb TARGETDIR="%CD%\Extract" /l*vx "%CD\install.log%"
иҝҷе°ҶдҪҝз”ЁеҪ“еүҚи·Ҝеҫ„е°ҶеҢ…еҶ…е®№жҸҗеҸ–еҲ°еӯҗзӣ®еҪ•'Extract'гҖӮ
зӯ”жЎҲ 20 :(еҫ—еҲҶпјҡ5)
1пјүзј–иҜ‘wixжәҗд»Јз Ғж—¶пјҢlight.exeеҝ…йЎ»еңЁе‘Ҫд»ӨиЎҢдёӯеј•з”ЁWixUIExtension.dllгҖӮдҪҝз”Ёе‘Ҫд»ӨиЎҢејҖе…і-extгҖӮ
2пјүеҰӮжһңж·»еҠ еҜ№WixUIExtension.dllзҡ„еј•з”ЁпјҢеҲҷйЎ№зӣ®ж— жі•зј–иҜ‘пјҢиҝҷеҫҲеҸҜиғҪжҳҜеӣ дёәDialog IDзҡ„еҶІзӘҒпјҢеҚіжӮЁзҡ„йЎ№зӣ®дҪҝз”Ёзҡ„еҜ№иҜқжЎҶIDдёҺWixUIExtensionдёӯзҡ„жҹҗдәӣж ҮеҮҶеҜ№иҜқжЎҶзӣёеҗҢ.dllпјҢдёәеҜ№иҜқжЎҶжҸҗдҫӣдёҚеҗҢзҡ„IDгҖӮиҝҷжҳҜдёҖдёӘйқһеёёжҷ®йҒҚзҡ„й—®йўҳгҖӮ
3пјүжӮЁзҡ„и®ёеҸҜиҜҒеҜ№иҜқжЎҶеҝ…йЎ»е…·жңүIDдёәвҖңLicenseTextвҖқзҡ„ScrollableTextжҺ§д»¶гҖӮ WixеңЁжү“еҚ°ж—¶дјҡжҗңзҙўеҲ°иҝҷдёӘжҺ§д»¶зҡ„еҗҚз§°гҖӮ
<Control Id="LicenseText" Type="ScrollableText" X="20" Y="60" Width="330" Height="160" Sunken="yes" TabSkip="no">
    <Text SourceFile="License.rtf" />
</Control>
е’ҢдёҖдёӘеј•з”ЁиҮӘе®ҡд№үж“ҚдҪңзҡ„PushButton
<Control Type="PushButton" Id="PrintButton" Width="57" Height="17" X="19" Y="244" Text="Print">
    <Publish Event="DoAction" Value="PrintEula">1</Publish>
</Control>
4пјүдҪҝз”ЁId =вҖңPrintEulaвҖқе®ҡд№үCustomActionпјҢеҰӮдёӢжүҖзӨәпјҡ
<CustomAction Id="PrintEula" BinaryKey="WixUIWixca" DllEntry="PrintEula" Return="ignore" Execute="immediate" />
жіЁж„ҸпјҡдёҺWix2.0зӣёжҜ”пјҢWix3.0дёӯзҡ„BinaryKeyдёҚеҗҢпјҢеҝ…йЎ»е®Ңе…ЁжҳҜвҖңWixUIWixcaвҖқпјҲеҢәеҲҶеӨ§е°ҸеҶҷпјүгҖӮ
еҪ“з”ЁжҲ·жҢүдёӢжҢүй’®ж—¶пјҢд»–/еҘ№е°ҶзңӢеҲ°ж ҮеҮҶзҡ„вҖңйҖүжӢ©жү“еҚ°жңәвҖқеҜ№иҜқжЎҶпјҢ并且еҸҜд»Ҙд»ҺйӮЈйҮҢиҝӣиЎҢжү“еҚ°гҖӮ
зӯ”жЎҲ 21 :(еҫ—еҲҶпјҡ5)
е°ҶеҸҜиғҪеңЁе…¶иҮӘе·ұзҡ„зүҮж®өдёӯеҚ•зӢ¬дҝ®иЎҘзҡ„组件ж”ҫе…Ҙ
еҲ¶дҪңдә§е“Ғе®үиЈ…зЁӢеәҸе’Ңдҝ®иЎҘзЁӢеәҸж—¶пјҢеҰӮжһңеңЁзүҮж®өдёӯеҢ…еҗ«д»»дҪ•з»„件пјҢеҲҷеҝ…йЎ»еңЁиҜҘзүҮж®өдёӯеҢ…еҗ«жүҖжңү组件гҖӮеңЁжһ„е»әе®үиЈ…зЁӢеәҸзҡ„жғ…еҶөдёӢпјҢеҰӮжһңжӮЁй”ҷиҝҮд»»дҪ•з»„件引用пјҢжӮЁе°Ҷд»Һlight.exe收еҲ°й“ҫжҺҘй”ҷиҜҜгҖӮдҪҶжҳҜпјҢеҪ“жӮЁеҲӣе»әиЎҘдёҒж—¶пјҢеҰӮжһңеңЁзүҮж®өдёӯеҢ…еҗ«еҚ•дёӘ组件引用пјҢеҲҷиҜҘзүҮж®өдёӯзҡ„жүҖжңүжӣҙж”№зҡ„组件е°ҶжҳҫзӨәеңЁжӮЁзҡ„иЎҘдёҒдёӯгҖӮ
еғҸиҝҷж ·пјҡ<Fragment>
<DirectoryRef Id="SampleProductFolder">
<Component Id="SampleComponent1" Guid="{C28843DA-EF08-41CC-BA75-D2B99D8A1983}" DiskId="1">
<File Id="SampleFile1" Source=".\$(var.Version)f\Sample1.txt" />
</Component>
</DirectoryRef>
</Fragment>
<Fragment>
<DirectoryRef Id="SampleProductFolder">
<Component Id="SampleComponent2" Guid="{6CEA5599-E7B0-4D65-93AA-0F2F64402B22}" DiskId="1">
<File Id="SampleFile2" Source=".\$(var.Version)f\Sample2.txt" />
</Component>
</DirectoryRef>
</Fragment>
<Fragment>
<DirectoryRef Id="SampleProductFolder">
<Component Id="SampleComponent3" Guid="{4030BAC9-FAB3-426B-8D1E-DC1E2F72C2FC}" DiskId="1">
<File Id="SampleFile3" Source=".\$(var.Version)f\Sample3.txt" />
</Component>
</DirectoryRef>
</Fragment>
иҖҢдёҚжҳҜпјҡ
<Fragment>
    <DirectoryRef Id="SampleProductFolder">
        <Component Id="SampleComponent1" Guid="{C28843DA-EF08-41CC-BA75-D2B99D8A1983}" DiskId="1">
            <File Id="SampleFile1" Source=".\$(var.Version)\Sample1.txt" />
        </Component>

        <Component Id="SampleComponent2" Guid="{6CEA5599-E7B0-4D65-93AA-0F2F64402B22}" DiskId="1">
           <File Id="SampleFile2" Source=".\$(var.Version)\Sample2.txt" />
        </Component>

        <Component Id="SampleComponent3" Guid="{4030BAC9-FAB3-426B-8D1E-DC1E2F72C2FC}" DiskId="1">
           <File Id="SampleFile3" Source=".\$(var.Version)\Sample3.txt" />
        </Component>
    </DirectoryRef>
</Fragment>
жӯӨеӨ–пјҢеңЁдҪҝз”ЁWiX.chmеё®еҠ©ж–Ү件дёӯзҡ„вҖңдҪҝз”ЁPurely WiXвҖқдё»йўҳиҝӣиЎҢдҝ®иЎҘж—¶пјҢдҪҝз”ЁжӯӨиҝҮзЁӢз”ҹжҲҗдҝ®иЎҘзЁӢеәҸпјҡ
torch.exe -p -xi 1.0\product.wixpdb 1.1\product.wixpdb -out patch\diff.wixmst
candle.exe patch.wxs
light.exe patch.wixobj -out patch\patch.wixmsp
pyro.exe patch\patch.wixmsp -out patch\patch.msp -t RTM patch\diff.wixmst
д»…д»…дҪҝз”ЁеҚ•зӢ¬зүҮж®өдёӯзҡ„组件жһ„е»әдәҶ1.1зүҲжң¬зҡ„product.wixpdbжҳҜдёҚеӨҹзҡ„гҖӮеӣ жӯӨпјҢиҜ·зЎ®дҝқеңЁеҸ‘иҙ§еүҚжӯЈзЎ®еҲҶеүІжӮЁзҡ„дә§е“ҒгҖӮ
зӯ”жЎҲ 22 :(еҫ—еҲҶпјҡ5)
жҲ‘们еңЁGUIзҡ„第дёҖдёӘеұҸ幕дёӯжҳҫзӨәдә§е“ҒзүҲжң¬пјҲеҫ®е°ҸпјүгҖӮеӣ дёәдәә们жҜҸж¬ЎйғҪйҖүжӢ©жӯЈзЎ®зҡ„зүҲжң¬ж—¶дјҡзҠҜй”ҷиҜҜгҖӮ пјҲ并让жҲ‘们зҡ„ејҖеҸ‘дәәе‘ҳеҜ»жүҫе№ҙйҫ„......пјү
жҲ‘们已и®ҫзҪ®TFSBuildд»Ҙз”ҹжҲҗе…·жңүдёҚеҗҢзҺҜеўғй…ҚзҪ®зҡ„иҪ¬жҚўпјҲ.mstж–Ү件пјүгҖӮ пјҲжҲ‘们дәҶи§ЈйңҖиҰҒйғЁзҪІзҡ„жүҖжңүзҺҜеўғпјүгҖӮ
з”ұдәҺж је…°зү№йңҚеҲ©иҝӘзҡ„еҺҹе§ӢеҚҡе®ўеё–еӯҗе·Іе…ій—ӯпјҢжҲ‘еӨҚеҲ¶е…¶еҶ…е®№пјҡ
MSBuildд»»еҠЎпјҢз”ЁдәҺд»ҺXMLMarch 11 2008з”ҹжҲҗMSIиҪ¬жҚўж–Ү件
еңЁжҲ‘д№ӢеүҚзҡ„ж–Үз« дёӯпјҢжҲ‘жҸҸиҝ°дәҶеҰӮдҪ•дҪҝз”ЁMSI TransformпјҲ* .mstпјүж–Ү件е°Ҷзү№е®ҡдәҺзҺҜеўғзҡ„й…ҚзҪ®и®ҫзҪ®дёҺйҖҡз”ЁMSIеҢ…еҲҶејҖгҖӮ
иҷҪ然иҝҷдёәжӮЁзҡ„й…ҚзҪ®жҸҗдҫӣдәҶдёҖе®ҡзЁӢеәҰзҡ„зҒөжҙ»жҖ§пјҢдҪҶиҪ¬жҚўж–Ү件жңүдёӨдёӘзјәзӮ№пјҡ
е№ёиҝҗзҡ„жҳҜпјҢжҲ‘们еҸҜд»ҘдҪҝз”ЁMicrosoft Windows InstallerеҜ№иұЎеә“пјҲcпјҡwindowssystem32msi.dllпјүжү“ејҖMSIвҖңж•°жҚ®еә“вҖқ并еҲӣе»әиҪ¬жҚўж–Ү件гҖӮ
CreditsеҶҚж¬ЎиҪ¬еҲ°Alex Shevchuk вҖ“ From MSI to WiX вҖ“ Part 7 - дҪҝз”ЁTransformsиҮӘе®ҡд№үе®үиЈ…пјҢеҗ‘жҲ‘们еұ•зӨәеҰӮдҪ•дҪҝз”ЁVbScriptе®һзҺ°жӯӨзӣ®зҡ„гҖӮеҹәжң¬дёҠжҲ‘жүҖеҒҡзҡ„е°ұжҳҜйҮҮз”ЁAlexзҡ„дҫӢеӯҗ并дҪҝз”ЁInterop.WindowsInstaller.dllжҲ‘е®һзҺ°дәҶдёҖдёӘMSBuildд»»еҠЎгҖӮ MSBuildд»»еҠЎ
Downloadжәҗд»Јз ҒпјҶamp;зӨәдҫӢtransforms.xmlпјҲ~7Kb Zipped VS2008 Solutionпјү
зӯ”жЎҲ 23 :(еҫ—еҲҶпјҡ4)
иҖҢдёҚжҳҜORCAдҪҝз”ЁInstEdпјҢиҝҷжҳҜжҹҘзңӢMSIиЎЁзҡ„еҘҪе·Ҙе…·гҖӮе®ғиҝҳиғҪеӨҹйҖҡиҝҮдёӨдёӘеҢ…жқҘеҢәеҲҶ еҸҳжҚў - пјҶgt;жҜ”иҫғ......
жӯӨеӨ–пјҢиҝҳжҸҗдҫӣдәҶе…·жңүйҷ„еҠ еҠҹиғҪзҡ„Plus versionгҖӮдҪҶе…Қиҙ№зүҲд№ҹдёәOrcaжҸҗдҫӣдәҶдёҖдёӘеҫҲеҘҪзҡ„йҖүжӢ©гҖӮ
зӯ”жЎҲ 24 :(еҫ—еҲҶпјҡ4)
NBжӯӨзүҮж®өдёҺ REGASM Assembly.dll / codebase
еҹәжң¬зӣёеҗҢиҝҷдёӘзӨәдҫӢдёӯжңүеҮ 件дәӢжғ…жӯЈеңЁеҸ‘з”ҹпјҢжүҖд»ҘиҝҷйҮҢжҳҜд»Јз ҒпјҢд№ӢеҗҺжҲ‘дјҡи§ЈйҮҠе®ғ......
  <Wix xmlns="http://schemas.microsoft.com/wix/2006/wi">
  <?include $(sys.CURRENTDIR)\Config.wxi?>
  <?if $(var.Win64) ?>
  <?define CLSIDRoots = "CLSID;Wow6432Node\CLSID"?>
  <?else ?>
  <?define CLSIDRoots = "CLSID"?>
  <?endif?>
  <!-- ASCOM Driver Assembly with related COM registrations -->
  <Fragment>
    <DirectoryRef Id="INSTALLLOCATION" />
  </Fragment>
  <Fragment>
    <ComponentGroup Id="cgAscomDriver">
      <Component Id="cmpAscomDriver" Directory="INSTALLLOCATION" Guid="{0267031F-991D-4D88-A748-00EC6604171E}">
        <File Id="filDriverAssembly" Source="$(var.TiGra.Astronomy.AWRDriveSystem.TargetPath)" KeyPath="yes" Vital="yes" Assembly=".net" AssemblyApplication="filDriverAssembly"  />
        <RegistryKey Root="HKCR" Key="$(var.DriverId)"  Action="createAndRemoveOnUninstall">
          <RegistryValue Type="string" Value="$(var.DriverTypeName)"/>
          <RegistryKey Key="CLSID">
            <RegistryValue Type="string" Value="$(var.DriverGuid)" />
          </RegistryKey>
        </RegistryKey>
        <?foreach CLSID in $(var.CLSIDRoots) ?>
        <RegistryKey Root="HKCR" Key="$(var.CLSID)" Action="none">
          <RegistryKey Key="$(var.DriverGuid)" Action="createAndRemoveOnUninstall">
            <RegistryValue Type="string" Value="$(var.DriverTypeName)"/>
            <RegistryKey Key="InprocServer32">
              <RegistryValue Type="string" Value="mscoree.dll" />
              <RegistryValue Type="string" Name="ThreadingModel" Value="Both"/>
              <RegistryValue Type="string" Name="Class" Value="$(var.DriverTypeName)"/>
              <RegistryValue Type="string" Name="Assembly" Value="!(bind.assemblyFullname.filDriverAssembly)" />
              <RegistryValue Type="string" Name="RuntimeVersion" Value="v2.0.50727"/>
              <RegistryValue Type="string" Name="CodeBase" Value="file:///[#filDriverAssembly]" />
              <RegistryKey Key="!(bind.fileVersion.filDriverAssembly)" >
                <RegistryValue Type="string" Name="Class" Value="$(var.DriverTypeName)"/>
                <RegistryValue Type="string" Name="Assembly" Value="!(bind.assemblyFullname.filDriverAssembly)" />
                <RegistryValue Type="string" Name="RuntimeVersion" Value="v2.0.50727"/>
                <RegistryValue Type="string" Name="CodeBase" Value="file:///[#filDriverAssembly]" />
              </RegistryKey>
            </RegistryKey>
            <RegistryKey Key="ProgId" Action="createAndRemoveOnUninstall">
              <RegistryValue Type="string" Value="$(var.DriverId)" />
            </RegistryKey>
            <RegistryKey Key="Implemented Categories" Action="createAndRemoveOnUninstall" >
              <RegistryKey Key="{62C8FE65-4EBB-45e7-B440-6E39B2CDBF29}" Action="createAndRemoveOnUninstall" />
            </RegistryKey>
          </RegistryKey>
        </RegistryKey>
        <?endforeach?>
      </Component>
    </ComponentGroup>
  </Fragment>
</Wix>
еҰӮжһңжӮЁжғізҹҘйҒ“пјҢиҝҷе®һйҷ…дёҠжҳҜASCOM Telescope DriverгҖӮ
йҰ–е…ҲпјҢжҲ‘д»ҺдёҠйқўиҺ·еҫ—дәҶе»әи®®пјҢ并еңЁдёҖдёӘеҚ•зӢ¬зҡ„ж–Ү件дёӯеҲӣе»әдәҶдёҖдәӣplatformaеҸҳйҮҸпјҢдҪ еҸҜд»ҘзңӢеҲ°йӮЈдәӣеҲҶж•ЈеңЁXMLдёӯзҡ„ж–Ү件гҖӮ
йЎ¶йғЁйҷ„иҝ‘зҡ„if-then-elseйғЁеҲҶеӨ„зҗҶx86 vs x64е…је®№жҖ§гҖӮжҲ‘зҡ„зЁӢеәҸйӣҶзӣ®ж ҮжҳҜвҖңд»»дҪ•CPUвҖқпјҢжүҖд»ҘеңЁx64зі»з»ҹдёҠпјҢжҲ‘йңҖиҰҒжіЁеҶҢдёӨж¬ЎпјҢдёҖж¬ЎеңЁ64дҪҚжіЁеҶҢиЎЁдёӯпјҢдёҖж¬ЎеңЁ32дҪҚWow6432NodeеҢәеҹҹгҖӮ if-then-elseдёәжӯӨи®ҫзҪ®дәҶиҝҷдәӣеҖјпјҢзЁҚеҗҺеңЁforeachеҫӘзҺҜдёӯдҪҝз”ЁиҝҷдәӣеҖјгҖӮиҝҷж ·пјҢжҲ‘еҸӘйңҖиҰҒзј–еҶҷдёҖж¬ЎжіЁеҶҢиЎЁйЎ№пјҲDRYеҺҹеҲҷпјүгҖӮ
fileе…ғзҙ жҢҮе®ҡжӯЈеңЁе®үиЈ…е’ҢжіЁеҶҢзҡ„е®һйҷ…зЁӢеәҸйӣҶdllпјҡ
<File Id="filDriverAssembly" Source="$(var.TiGra.Astronomy.AWRDriveSystem.TargetPath)" KeyPath="yes" Vital="yes" Assembly=".net" AssemblyApplication="filDriverAssembly" />
жІЎд»Җд№Ҳйқ©е‘ҪжҖ§зҡ„пјҢдҪҶиҜ·жіЁж„ҸAssembly=".net" - д»…жӯӨеұһжҖ§дјҡеҜјиҮҙзЁӢеәҸйӣҶиў«ж”ҫе…ҘGACпјҢиҝҷдёҚжҳҜжҲ‘жғіиҰҒзҡ„гҖӮдҪҝз”ЁAssemblyApplicationеұһжҖ§жҢҮеҗ‘иҮӘиә«еҸӘжҳҜйҳ»жӯўWixе°Ҷж–Ү件ж”ҫе…ҘGACзҡ„дёҖз§Қж–№жі•гҖӮ既然WixзҹҘйҒ“е®ғжҳҜдёҖдёӘ.netзЁӢеәҸйӣҶпјҢе®ғе…Ғи®ёжҲ‘еңЁжҲ‘зҡ„XMLдёӯдҪҝз”ЁжҹҗдәӣbinderеҸҳйҮҸпјҢдҫӢеҰӮ!(bind.assemblyFullname.filDriverAssembly)жқҘиҺ·еҸ–зЁӢеәҸйӣҶзҡ„е…ЁеҗҚгҖӮ
зӯ”жЎҲ 25 :(еҫ—еҲҶпјҡ3)
и®ҫзҪ®DISABLEADVTSHORTCUTSеұһжҖ§д»ҘејәеҲ¶е®үиЈ…зЁӢеәҸдёӯзҡ„жүҖжңүйҖҡе‘Ҡеҝ«жҚ·ж–№ејҸжҲҗдёә常规еҝ«жҚ·ж–№ејҸпјҢ并且жӮЁдёҚйңҖиҰҒеҢ…еҗ«иҷҡжӢҹжіЁеҶҢиЎЁйЎ№д»Ҙз”ЁдҪңй”®и·Ҝеҫ„гҖӮ
<Property Id="DISABLEADVTSHORTCUTS" Value="1"/>
жҲ‘и®ӨдёәWindows Installer 4.0жҲ–жӣҙй«ҳзүҲжң¬жҳҜrequirementгҖӮ
зӯ”жЎҲ 26 :(еҫ—еҲҶпјҡ2)
еҪ“е®үиЈ…дёҚе…Ғи®ёеҚёиҪҪжҲ–йҮҚж–°е®үиЈ…дё”дёҚеӣһж»ҡж—¶жү§иЎҢејәеҲ¶йҮҚж–°е®үиЈ…гҖӮ
VBscriptи„ҡжң¬з”ЁдәҺиҰҶзӣ–еӣ д»»дҪ•еҺҹеӣ ж— жі•еҚёиҪҪзҡ„е®үиЈ…..
Dim objShell
set objShell = wscript.createObject("wscript.shell")

iReturn = objShell.Run("CMD /K MsiExec.exe /I ""C:\Users\TheUser\Documents\Visual Studio 2010\Projects\InstallationTarget\HelloInstaller\bin\Debug\HelloInstaller.msi"" REINSTALLMODE=vomus REINSTALL=ALL",,True)
зӯ”жЎҲ 27 :(еҫ—еҲҶпјҡ2)
иҝҷжҳҜдёҖдёӘеҫҲеҘҪзҡ„з»“жһ„пјҢдҪҶж №жҚ®жҲ‘зҡ„з»ҸйӘҢпјҢжҲ‘жғізҹҘйҒ“дҪ еҰӮдҪ•и§ЈеҶіиҝҷдәӣй—®йўҳпјҡ
дёҖдёӘгҖӮжӮЁзҡ„жүҖжңүе®үиЈ…дјјд№ҺйғҪиҗҪеңЁеҗҢдёҖзӣ®зҡ„ең°гҖӮеҰӮжһңз”ЁжҲ·йңҖиҰҒеҗҢж—¶е®үиЈ…жүҖжңү3дёӘзүҲжң¬пјҢжӮЁзҡ„жөҒзЁӢе°Ҷе…Ғи®ёжӯӨж“ҚдҪңгҖӮ他们иғҪеҗҰжҳҺзЎ®ең°е‘ҠиҜү他们и§ҰеҸ‘зҡ„жҜҸдёӘеҸҜжү§иЎҢж–Ү件зҡ„е“ӘдёӘзүҲжң¬пјҹ
BдёӯгҖӮеҰӮдҪ•еӨ„зҗҶTESTе’Ң/жҲ–TRAININGдёӯеӯҳеңЁдҪҶе°ҡжңӘеңЁLIVEдёӯеӯҳеңЁзҡ„ж–°ж–Ү件пјҹ
зӯ”жЎҲ 28 :(еҫ—еҲҶпјҡ2)
еҲӣе»әдёҖдёӘе…·жңүиҮӘе®ҡд№үж“ҚдҪңзҡ„UIпјҢиҜҘж“ҚдҪңе°Ҷи®ҫзҪ®еҸҳйҮҸпјҢUIе°Ҷж №жҚ®иҮӘе®ҡд№үж“ҚдҪңдёӯи®ҫзҪ®зҡ„еҸҳйҮҸзҰҒз”Ё/еҗҜз”ЁдёӢдёҖдёӘжҢүй’®пјҲжҲ–зұ»дјјжҢүй’®пјүгҖӮ
дёҚеғҸдҪ жғіиұЎзҡ„йӮЈд№ҲзӣҙжҲӘдәҶеҪ“пјҢжІЎжңүеӨӘеӨҡеӣ°йҡҫпјҢеҸӘжҳҜжІЎжңүеңЁд»»дҪ•ең°ж–№и®°еҪ•пјҒ
Wix Interactions with Conditions, Properties & Custom Actions
зӯ”жЎҲ 29 :(еҫ—еҲҶпјҡ2)
Here'sдёҖз§Қеё®еҠ©еӨ§еһӢWebйЎ№зӣ®йӘҢиҜҒйғЁзҪІж–Ү件数йҮҸдёҺеҶ…зҪ®еҲ°MSIпјҲжҲ–еҗҲ并模еқ—пјүдёӯзҡ„ж–Ү件数йҮҸзӣёеҢ№й…Қзҡ„ж–№жі•гҖӮжҲ‘еҸӘжҳҜй’ҲеҜ№жҲ‘们зҡ„дё»еә”з”ЁзЁӢеәҸпјҲд»ҚеңЁејҖеҸ‘дёӯпјүиҝҗиЎҢиҮӘе®ҡд№үMSBuildд»»еҠЎпјҢ并且е®ғжӢҫеҸ–дәҶзӣёеҪ“еӨҡзҡ„дёўеӨұж–Ү件пјҢдё»иҰҒжҳҜеӣҫеғҸпјҢдҪҶжҳҜдёҖдәӣjavascriptж–Ү件已з»Ҹж»‘иҗҪеҲ°дәҶпјҒ
иҝҷз§Қж–№жі•пјҲйҖҡиҝҮжҢӮй’©еҲ°WiXйЎ№зӣ®зҡ„AfterBuildзӣ®ж ҮжқҘзӘҘи§ҶMSIзҡ„FileиЎЁпјүеҸҜд»Ҙз”ЁдәҺе…¶д»–еҸҜд»Ҙи®ҝй—®йў„жңҹж–Ү件е®Ңж•ҙеҲ—иЎЁзҡ„еә”з”ЁзЁӢеәҸзұ»еһӢгҖӮ
зӯ”жЎҲ 30 :(еҫ—еҲҶпјҡ1)
дҝ®еӨҚProgressDlgд»ҘдҪҝе…¶жӯЈеёёжҳҫзӨәгҖӮ
жҲ‘е·Іе°Ҷе®үиЈ…зЁӢеәҸзҡ„еӯ—дҪ“еӨ§е°Ҹд»Һ8еўһеҠ еҲ°10пјҢд»ҘдҪҝеӯ—дҪ“еңЁй«ҳеҲҶиҫЁзҺҮжҳҫзӨәеҷЁдёҠжӣҙеҠ дәәжҖ§еҢ–пјҢеҸҜз”ЁгҖӮжҲ‘з”ЁиҝҷдёӘXMLйӯ”жңҜжқҘеҒҡеҲ°иҝҷдёҖзӮ№пјҡ
<UI Id="MyCustomUI">
  <TextStyle Id="WixUI_Font_Normal" FaceName="Tahoma" Size="10" />
  <TextStyle Id="WixUI_Font_Big"    FaceName="Tahoma" Size="12" />
  <TextStyle Id="WixUI_Font_Bigger" FaceName="Tahoma" Size="14" />
  <TextStyle Id="WixUI_Font_Title"  FaceName="Tahoma" Size="12" Bold="yes" />

  <Property Id="DefaultUIFont" Value="WixUI_Font_Normal" />
</UI>
дҪҶиҝҷж„Ҹе‘ізқҖProgressDlgдёҚеҶҚиғҪжӯЈеёёжҳҫзӨәгҖӮиҝҷжҳҜжҳҫзӨәе®үиЈ…иҝӣеәҰзҡ„йӮЈдёӘпјҢе°ұеңЁжңҖеҗҺгҖӮ ActionTextдјҡиў«еүӘиЈҒпјҢеӣ жӯӨдёҚдјҡжҳҫзӨәgе’Ңjзӯүеӯ—жҜҚзҡ„дёӢ延гҖӮйҖҡиҝҮеңЁеҗҺеӨ„зҗҶJavascriptдёӯи°ғж•ҙProgressdialogдёҠеҗ„з§ҚжҺ§д»¶зҡ„еӨ§е°Ҹе’ҢдҪҚзҪ®жқҘи§ЈеҶіжӯӨй—®йўҳгҖӮз”ҹжҲҗMSIеҗҺиҝҗиЎҢжӯӨи„ҡжң¬пјҡ
var msiOpenDatabaseModeTransact = 1;
var filespec = WScript.Arguments(0);
var installer = new ActiveXObject("WindowsInstaller.Installer");
var database = installer.OpenDatabase(filespec, msiOpenDatabaseModeTransact);

// The text on the exit dialog is too close to the title.  This
// step moves the text down from Y=70 to Y=90, about one line.
sql = "UPDATE `Control` SET `Control`.`Y` = '90' " +
    "WHERE `Control`.`Dialog_`='ExitDialog' AND `Control`.`Control`='Description'";
view = database.OpenView(sql);
view.Execute();
view.Close();

// The progressbar is too close to the status text on the Progress dialog.
// This step moves the progressbar down from Y=115 to Y=118, about 1/3 line.
sql = "UPDATE `Control` SET `Control`.`Y` = '118' " +
    "WHERE `Control`.`Dialog_`='ProgressDlg' AND `Control`.`Control`='ProgressBar'";
view = database.OpenView(sql);
view.Execute();
view.Close();

// The StatusLabel and ActionText controls are too short on the Progress dialog,
// which means the bottom of the text is cut off.  This step
// increases the height from 10 to 16.
sql = "UPDATE `Control` SET `Control`.`Height` = '16' " +
    "WHERE `Control`.`Dialog_`='ProgressDlg' AND `Control`.`Control`='StatusLabel'";
view = database.OpenView(sql);
view.Execute();
view.Close();
sql = "UPDATE `Control` SET `Control`.`Height` = '16' " +
    "WHERE `Control`.`Dialog_`='ProgressDlg' AND `Control`.`Control`='ActionText'";
view = database.OpenView(sql);
view.Execute();
view.Close();

database.Commit();