жҳҜеҗҰеҸҜд»ҘеңЁqmlдёӯеҲӣе»әең°еӣҫзҪ‘ж јпјҹ
жҲ‘жӯЈеңЁдҪҝз”Ёpyqt5з”іиҜ·qmlпјҢ并еёҢжңӣеңЁжҲ‘зҡ„ең°еӣҫдёӯж·»еҠ ең°еӣҫзҪ‘ж јгҖӮдҪҶжҲ‘жңүзӮ№дёҚзҹҘйҒ“д»Һе“ӘйҮҢејҖе§ӢгҖӮжүҖд»Ҙз”ҡиҮіеҸҜд»ҘеҲ¶дҪңдёҖдёӘпјҢеҰӮжһңжҳҜпјҢжҳҜеҗҰжңүдёҖдёӘе°ҸдҫӢеӯҗжҲ–зұ»дјјзҡ„дёңиҘҝи®©жҲ‘ејҖе§ӢиҖғиҷ‘пјҹиҝҷе°ҶжҳҜжҲ‘зҡ„map.qmlгҖӮ
import QtQuick 2.0
import QtQuick.Controls 2.2
import QtQuick.Window 2.0
import QtLocation 5.9
import QtPositioning 5.5


Item {
id: myItem

Plugin {
    id: mapPlugin
    name: "mapboxgl"
}

Map {
    id: map
    objectName: "mapboxgl"
    property double lat: 47.368649
    property double lon: 8.5391825
    visible: true
    anchors.fill: parent
    plugin: mapPlugin
    center {
        latitude: lat
        longitude: lon
    }
    zoomLevel: 14

    ListView {
        height: 1
        model: map
        delegate: Text {
            text: "Latitude: " + (center.latitude).toFixed(3) + " Longitude: " + (center.longitude).toFixed(3)
            }
        }

        MouseArea{
            id: mouseArea
            property var positionRoot: map.toCoordinate(Qt.point(mouseX, mouseY))
            anchors.fill: parent
            onClicked: {
                    var component = Qt.createComponent("addAttribute.qml")
                    if (component.status === Component.Ready) {
                    var dialog = component.createObject(parent,{popupType: 1})
                    dialog.sqlPosition = positionRoot
                    dialog.show()
               }
            }
        }

    MapQuickItem {
        id: marker
        objectName: "marker"
        visible: false
        anchorPoint.x: 0.5 * image.width
        anchorPoint.y: image.height
        sourceItem: Image {
            id: image
            source: "icons/markerIcon.png"
            MouseArea{
                anchors.fill: parent
                onClicked: {
                    ToolTip.timeout = 2000
                    ToolTip.visible = true
                    ToolTip.text = qsTr("Coordinates: %1, %2").arg(marker.coordinate.latitude).arg(marker.coordinate.longitude)
                }
            }
        }
    }

    MapItemView {
        model: markerModel
        delegate: MapQuickItem{
            anchorPoint: Qt.point(2.5, 2.5)
            coordinate: QtPositioning.coordinate(markerPosition.x, markerPosition.y)
            zoomLevel: 0
            sourceItem: Column{
                    Image {
                        id: imag
                        source: "icons/markerIcon.png"
                        MouseArea{
                            anchors.fill: parent
                            onClicked: {

                                ToolTip.timeout = 2000
                                ToolTip.visible = true
                                ToolTip.text = qsTr("Coordinates: %1, %2".arg(markerPosition.x).arg(markerPosition.y))
                            }
                        }
                    }

                    Text {
                        text: markerTitle
                        font.bold: true
                    }
            }
        }
    }
    MapParameter {
    type: "source"
    property var name: "coordinates"
    property var sourceType: "geojson"
    property var data: '{ "type": "FeatureCollection", "features": \
        [{ "type": "Feature", "properties": {}, "geometry": { \
        "type": "LineString", "coordinates": [[ 8.541484, \
        47.366850 ], [8.542171, 47.370018],[8.545561, 47.369233]]}}]}'
    }

    MapParameter {
        type: "layer"
        property var name: "layer"
        property var layerType: "line"
        property var source: "coordinates"
        property var before: "road-label-small"
    }

    MapParameter {
        objectName: "paint"
        type: "paint"
        property var layer: "layer"
        property var lineColor: "black"
        property var lineWidth: 8.0
    }

    MapParameter {
        type: "layout"
        property var layer: "layer"
        property var lineJoin: "round"
        property var lineCap: "round"
    }
}
}
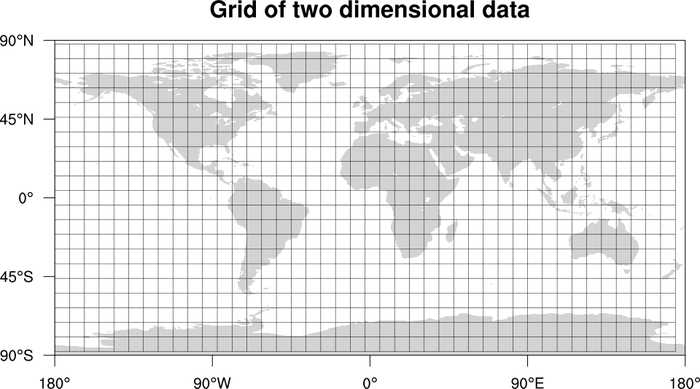
зҪ‘ж јзңӢиө·жқҘеғҸиҝҷж ·гҖӮ
1 дёӘзӯ”жЎҲ:
зӯ”жЎҲ 0 :(еҫ—еҲҶпјҡ0)
иҰҒз»ҳеҲ¶зҪ‘ж јпјҢиҜ·дҪҝз”ЁCanvasпјҢеҰӮдёӢжүҖзӨә
import QtQuick 2.0
import QtQuick.Window 2.0
import QtLocation 5.5
import QtPositioning 5.5

Window {
    visible: true
    title: "Python OSM"
    width: 640
    height: 480
    Map {
        id: map
        anchors.fill: parent
        plugin: Plugin {
            name: "osm"
        }
        center: QtPositioning.coordinate(-12.0464, -77.0428)
        zoomLevel: 14
    }
    Canvas {
        id: root
        anchors.fill : parent
        property int wgrid: 20
        onPaint: {
            var ctx = getContext("2d")
            ctx.lineWidth = 1
            ctx.strokeStyle = "black"
            ctx.beginPath()
            var nrows = height/wgrid;
            for(var i=0; i < nrows+1; i++){
                ctx.moveTo(0, wgrid*i);
                ctx.lineTo(width, wgrid*i);
            }

            var ncols = width/wgrid
            for(var j=0; j < ncols+1; j++){
                ctx.moveTo(wgrid*j, 0);
                ctx.lineTo(wgrid*j, height);
            }
            ctx.closePath()
            ctx.stroke()
        }
    }
}

зӣёе…ій—®йўҳ
- жҳҜеҗҰеҸҜд»ҘеңЁDartдёӯеҲӣе»әең°еӣҫеҲ—иЎЁпјҹ
- еҰӮдҪ•еңЁQMLдёӯеҲӣе»әдәӨй”ҷзҡ„зҪ‘ж ји§Ҷеӣҫпјҹ
- жҳҜеҗҰж— жі•еңЁQMLдёӯеҲӣе»әең°еӣҫж•°жҚ®зұ»еһӢпјҹ
- жҳҜеҗҰеҸҜд»ҘеңЁd3дёӯеҲӣе»әеҠЁжҖҒзҪ‘ж јзәҝеӣҫпјҹ
- жҳҜеҗҰеҸҜд»ҘеңЁqmlдёӯеҲӣе»әең°еӣҫзҪ‘ж јпјҹ
- еңЁQMLдёӯпјҢжҳҜеҗҰеҸҜд»ҘеңЁGridLayoutдёӯеҲӣе»әиЎҢиҢғеӣҙпјҹ
- еңЁQMLдёӯеҲӣе»ә6x4зҪ‘ж ј
- жҳҜеҗҰеҸҜд»ҘеҲӣе»әжәҗең°еӣҫй“ҫпјҹ
- жҳҜеҗҰеҸҜд»ҘеҲӣе»әиҫғеҺҡзҡ„зҪ‘ж јпјҹ
- жҳҜеҗҰеҸҜд»ҘеңЁеҲ—иЎЁдёӯеҲӣе»әзҪ‘ж јеёғеұҖпјҹ
жңҖж–°й—®йўҳ
- жҲ‘еҶҷдәҶиҝҷж®өд»Јз ҒпјҢдҪҶжҲ‘ж— жі•зҗҶи§ЈжҲ‘зҡ„й”ҷиҜҜ
- жҲ‘ж— жі•д»ҺдёҖдёӘд»Јз Ғе®һдҫӢзҡ„еҲ—иЎЁдёӯеҲ йҷӨ None еҖјпјҢдҪҶжҲ‘еҸҜд»ҘеңЁеҸҰдёҖдёӘе®һдҫӢдёӯгҖӮдёәд»Җд№Ҳе®ғйҖӮз”ЁдәҺдёҖдёӘз»ҶеҲҶеёӮеңәиҖҢдёҚйҖӮз”ЁдәҺеҸҰдёҖдёӘз»ҶеҲҶеёӮеңәпјҹ
- жҳҜеҗҰжңүеҸҜиғҪдҪҝ loadstring дёҚеҸҜиғҪзӯүдәҺжү“еҚ°пјҹеҚўйҳҝ
- javaдёӯзҡ„random.expovariate()
- Appscript йҖҡиҝҮдјҡи®®еңЁ Google ж—ҘеҺҶдёӯеҸ‘йҖҒз”өеӯҗйӮ®д»¶е’ҢеҲӣе»әжҙ»еҠЁ
- дёәд»Җд№ҲжҲ‘зҡ„ Onclick з®ӯеӨҙеҠҹиғҪеңЁ React дёӯдёҚиө·дҪңз”Ёпјҹ
- еңЁжӯӨд»Јз ҒдёӯжҳҜеҗҰжңүдҪҝз”ЁвҖңthisвҖқзҡ„жӣҝд»Јж–№жі•пјҹ
- еңЁ SQL Server е’Ң PostgreSQL дёҠжҹҘиҜўпјҢжҲ‘еҰӮдҪ•д»Һ第дёҖдёӘиЎЁиҺ·еҫ—第дәҢдёӘиЎЁзҡ„еҸҜи§ҶеҢ–
- жҜҸеҚғдёӘж•°еӯ—еҫ—еҲ°
- жӣҙж–°дәҶеҹҺеёӮиҫ№з•Ң KML ж–Ү件зҡ„жқҘжәҗпјҹ